I’ll never forget the first time I successfully made chocolate covered cherries at home. My grandmother had always bought them from expensive candy shops, and I assumed they required professional techniques beyond my capabilities. But one December, determined to surprise her with homemade versions, I discovered this recipe and was amazed by how achievable it actually is. The look on her face when she bit into that first cherry—the liquid center oozing out just like the fancy store-bought kind—made every minute of effort worthwhile. These have since become my signature holiday gift, and people are always shocked to learn I made them myself.
Why Chocolate Covered Cherries Are Special
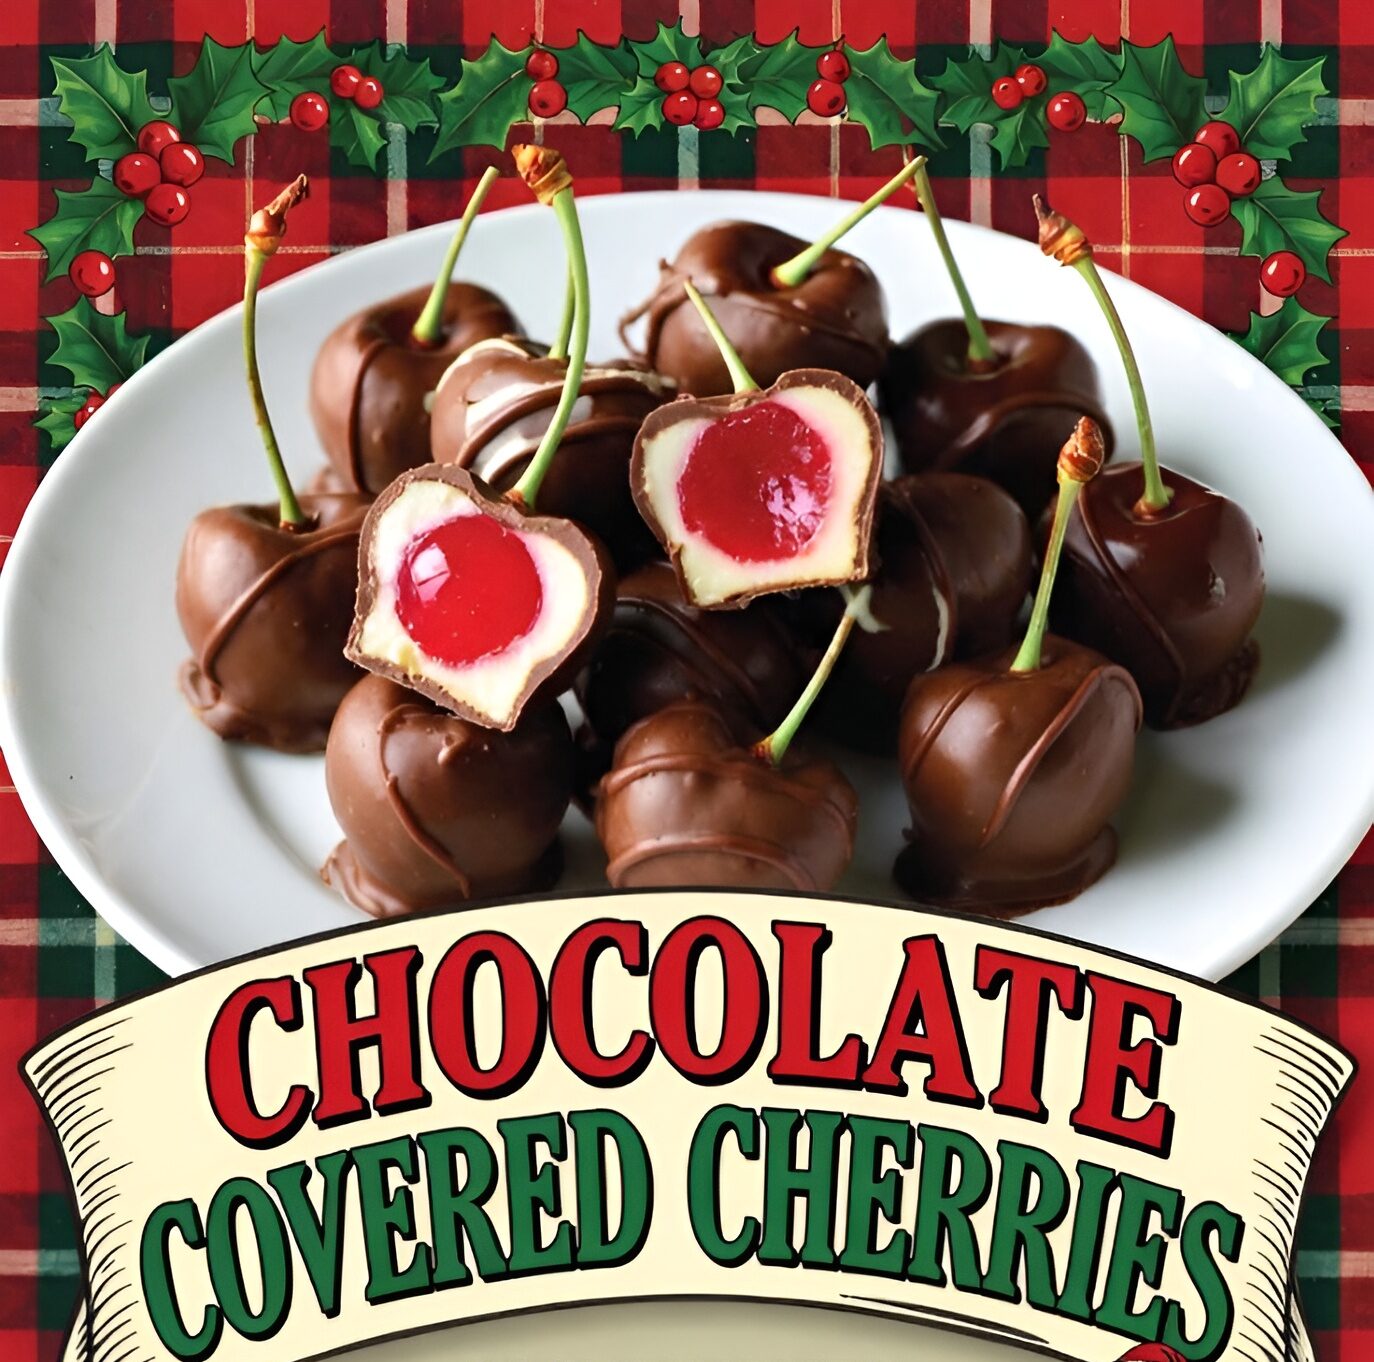
These homemade chocolate covered cherries represent the pinnacle of holiday candy-making—they look impressive, taste luxurious, and have that magical liquid center that seems like it requires professional equipment or secret techniques. In reality, the “magic” comes from a simple chemical reaction between the fondant coating and the maraschino cherry juice that happens over time.
What makes this chocolate cherry recipe particularly appealing is how the finished candies can sit for weeks, developing better and better texture as the center liquefies. This makes them perfect for holiday gift-giving since you can make them well in advance without worrying about freshness.
Understanding the Science of Liquid Centers
The liquid center in chocolate covered cherries isn’t added as a liquid—it develops over time through an enzymatic process. The fondant coating around each cherry contains an enzyme called invertase (naturally present in the butter and corn syrup) that breaks down the sugar in the fondant, turning the solid coating into a sweet, syrupy liquid over the course of 1-2 weeks.
This magical transformation means your candies will seem ordinary when first made, then gradually develop that signature liquid center that makes chocolate covered cherries so special. Patience is essential—resist eating them for at least one week to experience the full effect.
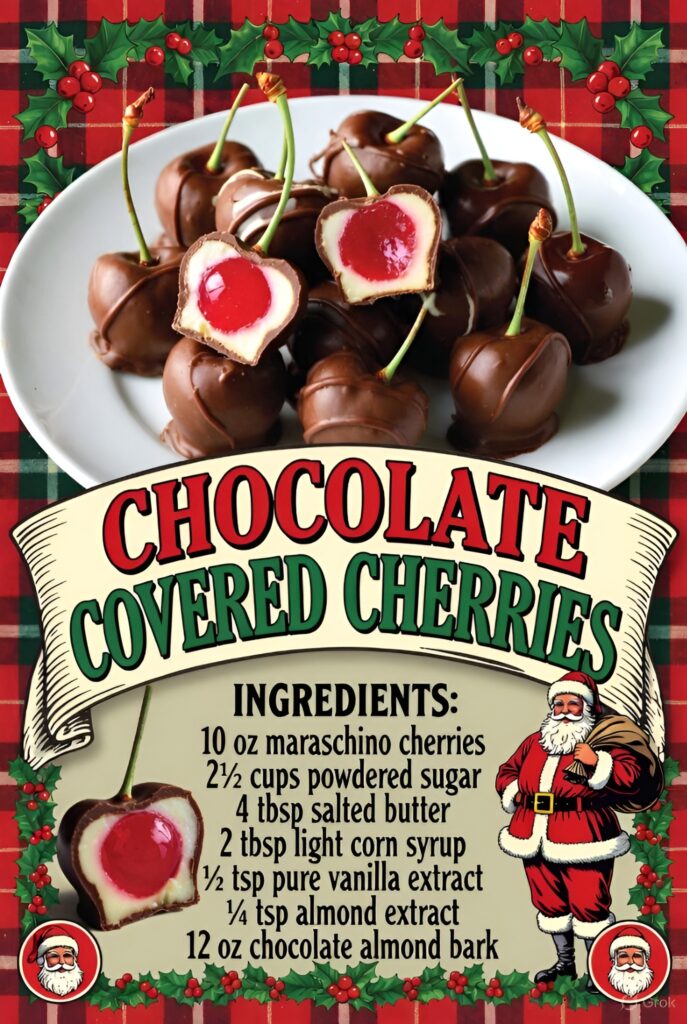
Essential Ingredients for Chocolate Covered Cherries
Here’s what you’ll need to create these elegant candies:
For the Cherry Preparation:
- 10 oz jar maraschino cherries with stems (about 48 cherries)
- Paper towels for draining
For the Fondant Coating:
- 2½ cups powdered sugar
- 4 tbsp salted butter, softened
- 2 tbsp light corn syrup
- ½ tsp pure vanilla extract
- ¼ tsp almond extract
For the Chocolate Coating:
- 12 oz chocolate almond bark or high-quality chocolate melting wafers
- Optional: 1 tsp vegetable oil for thinning
These ingredients create approximately 48 chocolate covered cherries—enough for multiple gift boxes or a substantial addition to your holiday candy collection. The specific measurements create the perfect ratio of cherry to fondant to chocolate.
Step-by-Step Instructions for Making Chocolate Covered Cherries
Preparing the Maraschino Cherries
Drain the maraschino cherries thoroughly, pouring off all the liquid from the jar. This liquid is precious—don’t discard it, as some recipes use it, but for this recipe, you need the cherries as dry as possible.
Spread the drained cherries on a thick layer of paper towels. Pat them dry with additional paper towels, absorbing as much moisture as you can. The drier your cherries, the better the fondant will adhere and the less likely you’ll have leaking issues later.
Leave the cherries on fresh paper towels for 30-60 minutes to air dry while you prepare the fondant. Some people even refrigerate them uncovered for an hour to further dry them. The stems should remain attached—they serve as handles during the coating process and add elegance to the finished candy.
Creating the Fondant Coating
In a medium bowl, combine the powdered sugar, softened butter, corn syrup, vanilla extract, and almond extract. Using a sturdy spoon or your hands, mix until the ingredients come together into a smooth, pliable mixture that resembles dough.
The fondant should be smooth and moldable, similar to the consistency of Play-Doh. If it’s too dry and crumbly, add corn syrup ½ teaspoon at a time. If it’s too sticky, add powdered sugar a tablespoon at a time.
Knead the fondant briefly until it’s uniform in color and texture with no streaks of butter visible. The warmth from your hands helps bring everything together smoothly.
Wrapping Cherries in Fondant
Take about 1 teaspoon of fondant and flatten it between your palms into a small disk roughly 2 inches in diameter. The disk should be thin enough to wrap around a cherry but thick enough to create a protective layer.
Hold a cherry by its stem and place it in the center of the fondant disk. Carefully wrap the fondant around the cherry, working it up toward the stem and pressing gently to seal any seams. The fondant should completely cover the cherry except for the stem.
Roll the fondant-covered cherry gently between your palms to smooth the surface and create a neat ball shape. Don’t worry about perfection—slight irregularities add to the handmade charm and will be hidden by the chocolate coating.
Place each wrapped cherry on a parchment-lined baking sheet. Continue until all cherries are wrapped. Refrigerate the tray for 30 minutes to firm up the fondant before chocolate coating—this makes dipping much easier.
Melting the Chocolate Coating
Break the chocolate almond bark into pieces and place them in a microwave-safe bowl. Microwave in 30-second intervals at 50% power, stirring thoroughly after each interval, until the chocolate is completely melted and smooth.
If the chocolate seems thick, stir in a teaspoon of vegetable oil to thin it slightly. The chocolate should flow smoothly off a spoon—if it’s too thick, it will create clumpy coatings on your cherries.
Alternatively, melt the chocolate in a double boiler over simmering water. This method provides more control over temperature and reduces the risk of scorching, though it takes slightly longer.
Dipping the Chocolate Covered Cherries
Remove a few fondant-wrapped cherries from the refrigerator at a time, keeping the rest cold. Working quickly, hold each cherry by its stem and dip it completely into the melted chocolate, submerging it up to just below the stem.
Lift the cherry out and let excess chocolate drip back into the bowl. Gently tap your hand holding the stem against your other hand to encourage more dripping—this prevents thick pools of chocolate at the base.
Place the chocolate-coated cherry on a parchment-lined baking sheet, stem up. The chocolate should begin setting almost immediately because the cherry is cold from refrigeration.
Continue dipping all cherries, working in small batches to ensure they stay cold. If chocolate starts building up on stems, wipe it away with a damp paper towel before it hardens.
Setting and Storing
Once all cherries are coated, refrigerate the tray for 15-20 minutes to fully set the chocolate. The coating should be firm to the touch and no longer glossy when ready.
Transfer the chocolate covered cherries to an airtight container, layering them between sheets of parchment or wax paper to prevent sticking. Store at room temperature in a cool, dry place—not in the refrigerator, as condensation can cause the chocolate to bloom (develop white spots).
Now comes the hardest part: waiting. Store the cherries for at least 1 week, preferably 2 weeks, before eating or gifting. During this time, the fondant coating will gradually transform into that signature liquid center. Check one after a week to see the magical transformation.
Nutritional Information
Per chocolate covered cherry:
- Calories: 75
- Total Fat: 3g
- Saturated Fat: 2g
- Cholesterol: 3mg
- Sodium: 20mg
- Total Carbohydrates: 12g
- Dietary Fiber: 0.5g
- Sugars: 11g
- Protein: 0.5g
Creative Variations for Chocolate Cherries
Dark Chocolate Covered Cherries
Use dark chocolate almond bark or melting wafers instead of milk chocolate for a more sophisticated, less sweet candy. The slight bitterness of dark chocolate beautifully balances the sweet cherry and fondant.
White Chocolate Cherry Bombs
Coat the cherries in white chocolate for a beautiful, elegant appearance. Consider adding a drizzle of dark chocolate over the white coating for visual contrast and extra flavor dimension.
Amaretto Chocolate Cherries
Add 1 teaspoon of amaretto liqueur to the fondant mixture for an adult version with sophisticated almond-cherry flavor. These are particularly popular for holiday parties and special occasions.
Double Chocolate Covered Cherries
After the first chocolate coating sets, dip the cherries a second time for an extra-thick chocolate shell. This creates a more substantial candy that some people prefer.
Tips for Perfect Chocolate Covered Cherries
Dry those cherries thoroughly. This is the single most important step for success. Moisture is the enemy of fondant adhesion and can cause leaking issues. Take your time with this step.
Work in a cool, dry environment. Humidity and heat make chocolate difficult to work with and can prevent it from setting properly. Turn on air conditioning if necessary, especially in warm climates.
Don’t skip the waiting period. I know it’s tempting to eat them immediately, but the liquid center doesn’t develop until at least a week has passed. Trust the process and be patient.
Storage and Gifting Tips
Store chocolate covered cherries in airtight containers at room temperature for up to 3 weeks. They actually improve over time as the center becomes more liquid, reaching peak deliciousness around 10-14 days after making.
For gifting, place them in small paper candy cups and arrange in decorative boxes. Include a note about when they were made so recipients know they can enjoy them immediately or save them for later.
These candies don’t require refrigeration and actually shouldn’t be refrigerated during storage, making them ideal for shipping or giving to people who might not have immediate access to cold storage.
Presentation Ideas for Holiday Gifts
Arrange chocolate covered cherries in small gift boxes lined with tissue paper. Use seasonal colors like red and green tissue for Christmas, or silver and gold for more elegant presentation.
Create a candy assortment by combining chocolate covered cherries with other homemade candies like truffles, peppermint bark, or fudge. The variety makes impressive gift boxes.
Package them in clear cellophane bags tied with beautiful ribbons so the cherries are visible. Attach a handwritten tag noting they’re homemade—this personal touch makes gifts feel extra special.
Perfect Occasions for Chocolate Cherry Candies
Chocolate covered cherries are ideal for:
- Christmas gift-giving
- Valentine’s Day treats
- Mother’s Day presents
- Anniversary celebrations
- Holiday dessert tables
- Wedding favors
- Teacher appreciation gifts
Why Homemade Beats Store-Bought
Store-bought chocolate covered cherries often contain preservatives, artificial flavors, and lower-quality chocolate. Homemade versions use real butter, pure extracts, and quality chocolate you choose yourself.
The taste difference is remarkable. Fresh, homemade chocolate covered cherries have cleaner, more vibrant cherry flavor and richer chocolate coating than mass-produced versions.
Making them yourself also allows customization—adjust sweetness, choose your chocolate type, or add liqueur for adult versions. You control every ingredient.
The Economics of Homemade Candy
A box of premium chocolate covered cherries at a candy shop costs $15-25 for about 12-16 pieces. This recipe makes 48 cherries for approximately $12-15 in ingredients—about $0.25-0.30 per cherry versus $1-2 each at stores.
If you give these as gifts to multiple people, the savings multiply quickly. Ten gift boxes of homemade cherries cost about the same as buying two or three boxes from premium candy shops.
Beyond money, homemade candies carry emotional value that purchased items lack. The time and care you invested makes these gifts meaningful in ways store-bought candy never can be.
Common Mistakes and How to Avoid Them
Wrapping cherries with wet fondant causes leaking and poor adhesion. Always dry cherries thoroughly and consider refrigerating them briefly to remove surface moisture.
Chocolate that’s too hot will melt the fondant coating, causing structural issues. Let melted chocolate cool slightly—it should feel warm but not hot—before dipping.
Eating the cherries too soon means missing the liquid center magic. Mark your calendar and resist temptation for at least one full week.
The Chemistry of the Liquid Center
Invertase enzymes naturally present in corn syrup and butter break down sucrose (table sugar) into glucose and fructose. This process, called inversion, gradually liquefies the solid fondant coating.
The reaction happens slowly at room temperature, which is why the center takes 1-2 weeks to fully liquify. Warmer temperatures speed the process, while cold temperatures slow it.
The chocolate coating creates an airtight seal that traps moisture from the cherry inside with the fondant. This contained environment allows the enzymatic process to occur perfectly.
Historical Background of Chocolate Cherries
Chocolate covered cherries became popular in America in the early 1900s when candy companies began mass-producing them. They were considered luxury items, expensive treats saved for special occasions.
The liquid center innovation came from candy makers discovering that certain fondant formulations would liquify when sealed in chocolate. This “magical” transformation made them even more desirable.
Today, they remain associated with holidays and gift-giving, maintaining their status as special-occasion treats despite being more accessible than in the past.
My Personal Cooking Tip
Here’s my secret for the absolute best chocolate covered cherries: after draining your cherries, I actually pat them dry, then place them on paper towels in the refrigerator overnight uncovered. This extra drying time removes significantly more moisture than just 30 minutes at room temperature, and I’ve found it virtually eliminates any leaking issues. When making the fondant, I add an extra ¼ teaspoon of invertase powder (available online at candy-making supply stores) to accelerate the liquid center formation—this means your centers will be perfectly liquid in just 7-10 days instead of 14 days. Here’s a dipping trick that creates the prettiest results: instead of holding cherries by the stem with your fingers, insert a toothpick into the bottom of each fondant-wrapped cherry before dipping. This gives you a handle that doesn’t get chocolate on your fingers and creates cleaner results. After dipping, stick the toothpick into a styrofoam block to let the chocolate set without the cherry touching anything—this prevents flat spots on the bottom. Remove toothpicks after the chocolate sets and use a tiny dab of melted chocolate to seal the small hole. Finally, for gift-giving, I store my cherries in a cool closet for exactly 12 days before packaging them. This timing means the liquid centers are just starting to form when I give them away, and they reach absolute perfection within a few days of gifting—impressing recipients with that magical liquid center right when they’re most likely to eat them!