I’ll never forget the evening I discovered mug cakes. It was a Tuesday night, I was craving something sweet after dinner, but the thought of preheating the oven and making a full batch of anything felt overwhelming. That’s when I stumbled upon the concept of microwave mug desserts, and my late-night snacking life was forever changed. Within minutes, I had a warm, perfectly portioned dessert that satisfied my craving without the guilt of having leftovers tempting me all week.
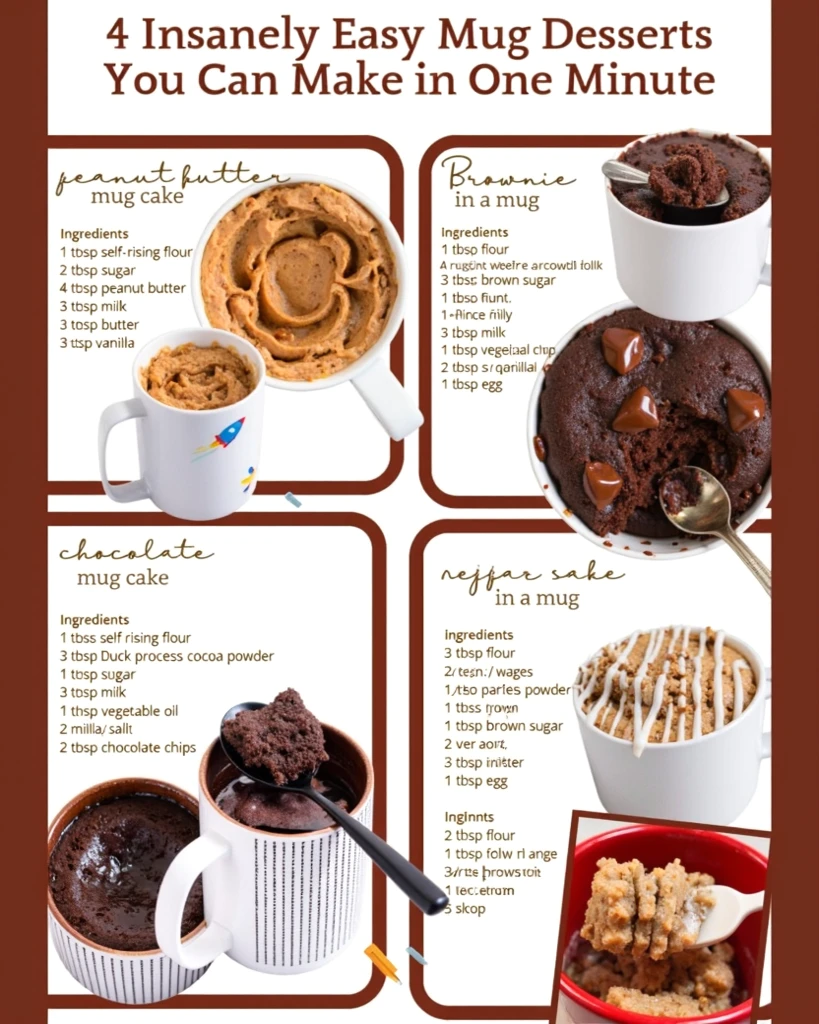
These four mug dessert recipes have become my secret weapons for those moments when you need something sweet immediately. Moreover, they’re incredibly forgiving and easy to customize based on whatever ingredients you have in your pantry. Whether you’re cooking for one or entertaining unexpected guests, these single-serving treats deliver maximum satisfaction with minimal effort.
Why Mug Desserts Are Revolutionary
After making countless batches of traditional desserts over the years, I can confidently say that mug desserts have earned their place in my regular rotation. They solve so many common baking challenges—no special equipment needed, no lengthy prep time, and absolutely no temptation to overindulge since you’re making exactly one portion.
Furthermore, these microwave mug desserts are perfect for teaching kids basic baking skills. The short cooking time means they stay engaged throughout the process, and the immediate gratification keeps them excited about cooking. Additionally, since each person makes their own mug dessert, everyone can customize their treat to their preferences.
Understanding the Science of Microwave Mug Desserts
Creating successful mug desserts requires understanding how microwave cooking differs from conventional oven baking. Microwaves heat food from the inside out, which means your dessert cooks much faster but can also become rubbery if overcooked. I’ve learned through trial and error that less is more when it comes to microwave time.
The key to perfect mug desserts lies in the moisture content. Too little liquid, and your dessert becomes dry and crumbly. However, too much liquid creates a soupy mess. These four recipes strike the perfect balance, creating moist, cake-like textures that rival their oven-baked counterparts.
Choosing the Right Mug for Dessert Success
Not all mugs are created equal when it comes to mug desserts. I always use microwave-safe ceramic mugs that hold at least 12 ounces. Smaller mugs can cause overflow, while metal mugs are dangerous in the microwave. Additionally, I prefer mugs with straight sides rather than tapered ones, as they promote more even cooking.
The material of your mug affects cooking time as well. Thicker ceramic mugs retain more heat and may require slightly less microwave time, while thinner mugs cook faster but don’t stay warm as long. After extensive testing, I’ve found that standard coffee mugs work perfectly for these dessert recipes.
Essential Ingredients for Peanut Butter Mug Cake
For the Peanut Butter Mug Cake:
- 4 tablespoons self-rising flour
- 3 tablespoons granulated sugar
- 4 tablespoons creamy peanut butter
- 3 tablespoons whole milk
- 3 tablespoons unsalted butter, melted
- ½ teaspoon vanilla extract
This peanut butter mug cake has become my absolute favorite late-night treat. The combination of nutty richness and sweet cake creates something truly special. Moreover, it comes together in under two minutes from start to finish, making it perfect for those moments when patience is not a virtue.
Selecting Quality Peanut Butter for Mug Cakes
The type of peanut butter you use significantly impacts your mug cake results. I strongly recommend using conventional creamy peanut butter rather than natural varieties. Natural peanut butter contains more oil and less sugar, which can make your mug cake greasy and less sweet. Additionally, the emulsifiers in regular peanut butter help create a better texture in these quick-cooking desserts.
Step-by-Step Instructions for Peanut Butter Mug Cake
Step 1: In your microwave-safe mug, combine the self-rising flour and sugar. Whisk them together with a fork to ensure even distribution and remove any lumps from the flour.
Step 2: Add the peanut butter, melted butter, milk, and vanilla extract to the dry ingredients. Stir vigorously with a fork or small whisk until the batter is completely smooth and no flour streaks remain. This thorough mixing is crucial for a uniform texture in your mug cake.
Step 3: Microwave on high power for 60-90 seconds. Start with 60 seconds, then check for doneness. The top should look set but still slightly moist. Remember, the mug cake will continue cooking from residual heat after you remove it from the microwave.
Step 4: Let the peanut butter mug cake cool for about 1 minute before eating. It will be extremely hot straight from the microwave. I often top mine with a drizzle of chocolate sauce or a sprinkle of crushed peanuts for extra indulgence.
Creating the Perfect Brownie in a Mug
For the Brownie in a Mug:
- 3 tablespoons all-purpose flour
- 3 tablespoons Dutch-process cocoa powder
- 3 tablespoons brown sugar
- 1 pinch of salt
- ¼ teaspoon vanilla extract
- 3 tablespoons whole milk
- 3 tablespoons vegetable oil
- 2 tablespoons chocolate chips
- 1 tablespoon beaten egg (about half an egg)
The brownie mug cake delivers that perfect fudgy texture we all crave from brownies, but in a fraction of the time. This has become my go-to recipe when I’m craving chocolate but don’t want to commit to making a full pan of brownies. Furthermore, the individual portion means I can indulge without overdoing it.
Achieving Fudgy Texture in Microwave Brownies
The secret to a truly fudgy brownie mug cake lies in not overcooking it. I’ve found that slightly undercooking produces better results than overcooking, as the residual heat continues the cooking process. Additionally, using Dutch-process cocoa powder rather than natural cocoa creates a deeper, more sophisticated chocolate flavor in this quick dessert.
Mastering the Brownie Mug Cake Technique
Step 1: In your mug, whisk together the flour, cocoa powder, brown sugar, and salt until well combined. Breaking up any cocoa lumps at this stage prevents bitter pockets in your finished brownie mug cake.
Step 2: Add the milk, vegetable oil, vanilla extract, and beaten egg. Stir thoroughly until you have a smooth, glossy batter. The mixture should be thick but pourable.
Step 3: Fold in the chocolate chips, reserving a few to sprinkle on top if desired. These create delightful pockets of melted chocolate throughout your brownie mug cake.
Step 4: Microwave on high for 60-75 seconds. The brownie should look set on top but still slightly gooey in the center. This slight undercooking ensures a fudgy rather than cakey texture.
Step 5: Allow the brownie mug cake to rest for 2 minutes before eating. The center will continue to set during this time, reaching the perfect consistency.
Baking a Classic Chocolate Mug Cake
For the Chocolate Mug Cake:
- ⅓ cup self-rising flour
- 2 tablespoons unsweetened cocoa powder
- 2 tablespoons granulated sugar
- ⅓ cup whole milk
- 2 tablespoons vegetable oil
- ½ teaspoon vanilla extract
- 2 tablespoons chocolate chips
This chocolate mug cake represents the perfect balance between a brownie and a traditional cake. It’s lighter than the brownie version but still intensely chocolatey. Moreover, it’s the most versatile of these four recipes, accepting add-ins and toppings beautifully.
Customizing Your Chocolate Mug Cake
I love experimenting with different additions to this basic chocolate mug cake recipe. A tablespoon of mini marshmallows creates a s’mores-inspired treat, while a spoonful of peanut butter swirled into the center makes it reminiscent of a peanut butter cup. Additionally, a sprinkle of instant espresso powder intensifies the chocolate flavor without making the cake taste like coffee.
Perfecting the Chocolate Mug Cake Method
Step 1: Combine the self-rising flour, cocoa powder, and sugar in your mug. Use a fork to mix thoroughly, ensuring the cocoa powder is evenly distributed throughout the flour.
Step 2: Pour in the milk, vegetable oil, and vanilla extract. Stir vigorously until no dry ingredients remain and the batter is completely smooth.
Step 3: Mix in the chocolate chips, distributing them evenly throughout the batter. You can also press a few into the top for visual appeal.
Step 4: Microwave on high power for 70-90 seconds, depending on your microwave’s wattage. The chocolate mug cake should rise significantly and the top should appear set.
Step 5: Let it cool for 1-2 minutes. This cooling period allows the structure to firm up slightly while the cake remains warm and comforting.
Crafting a Delightful Coffee Cake in a Mug
For the Coffee Cake in a Mug:
- 3 tablespoons all-purpose flour
- ¼ teaspoon ground cinnamon
- ½ teaspoon baking powder
- 1 tablespoon granulated sugar
- 1 tablespoon brown sugar
- Pinch of salt
- 1 tablespoon unsalted butter, melted
- 3 tablespoons whole milk
For the Streusel Topping:
- 1 tablespoon all-purpose flour
- 1 tablespoon brown sugar
- ¼ teaspoon ground cinnamon
- 1 teaspoon unsalted butter, softened
For the Glaze:
- 2 tablespoons powdered sugar
- 1-2 teaspoons milk
This coffee cake mug dessert might be my most impressive creation. It features all the elements of a traditional coffee cake—the tender crumb, the crunchy streusel, and the sweet glaze—but cooks in just over a minute. Furthermore, it makes the perfect breakfast treat or afternoon snack with a cup of coffee.
Creating the Perfect Streusel Topping
The streusel topping is what elevates this mug cake from good to exceptional. I make it by rubbing the butter, flour, brown sugar, and cinnamon together with my fingers until it forms small clumps. This creates that signature crumbly texture we associate with coffee cake streusel. Additionally, making the streusel before assembling the cake gives it time to firm up slightly.
Assembling the Coffee Cake Mug Dessert
Step 1: In your mug, whisk together the flour, cinnamon, baking powder, both sugars, and salt until well combined.
Step 2: Add the melted butter and milk, stirring until you have a smooth batter. The consistency should be slightly thicker than the other mug cake batters.
Step 3: Prepare the streusel by mixing the flour, brown sugar, and cinnamon in a small bowl. Cut in the softened butter with a fork until the mixture resembles coarse crumbs.
Step 4: Sprinkle the streusel evenly over the top of the batter in the mug. Don’t stir it in—you want it to remain on top.
Step 5: Microwave on high for 60-75 seconds until the cake is set and the streusel looks lightly browned.
Step 6: While the coffee cake cools slightly, whisk together the powdered sugar and milk to create a glaze. Drizzle it over the warm cake before serving.
Pro Tips for Perfect Mug Desserts Every Time
After making hundreds of mug desserts, I’ve discovered several tricks that guarantee success. First, always use a mug that’s larger than you think you need. These desserts rise significantly during cooking, and overflow is messy and disappointing. I recommend mugs that hold at least 12 ounces for all of these recipes.
Moreover, microwave wattages vary significantly, which affects cooking times. If you have a powerful microwave (1000+ watts), start checking your mug dessert at the minimum suggested time. Conversely, lower-wattage microwaves may require an additional 10-15 seconds. Additionally, remember that slightly undercooking is better than overcooking, as carryover cooking continues after you remove the mug.
Ingredient Temperature Matters
While these mug desserts are designed for convenience, using room-temperature ingredients when possible improves results. Cold milk and eggs can create uneven cooking, with some parts of your dessert remaining raw while others overcook. I typically take my milk and eggs out of the refrigerator while I gather my other ingredients, giving them a few minutes to warm up slightly.
Nutritional Information for Mug Desserts
Peanut Butter Mug Cake (per serving):
- Calories: 420
- Total Fat: 26g
- Saturated Fat: 9g
- Cholesterol: 35mg
- Sodium: 280mg
- Total Carbohydrates: 41g
- Sugars: 25g
- Protein: 10g
Brownie in a Mug (per serving):
- Calories: 385
- Total Fat: 22g
- Saturated Fat: 6g
- Cholesterol: 45mg
- Sodium: 95mg
- Total Carbohydrates: 45g
- Sugars: 30g
- Protein: 5g
Chocolate Mug Cake (per serving):
- Calories: 340
- Total Fat: 16g
- Saturated Fat: 5g
- Cholesterol: 8mg
- Sodium: 220mg
- Total Carbohydrates: 47g
- Sugars: 28g
- Protein: 5g
Coffee Cake in a Mug (per serving):
- Calories: 295
- Total Fat: 8g
- Saturated Fat: 5g
- Cholesterol: 20mg
- Sodium: 185mg
- Total Carbohydrates: 52g
- Sugars: 32g
- Protein: 4g
Serving Suggestions for Mug Desserts
While these mug desserts are delicious on their own, I love dressing them up for special occasions. The peanut butter mug cake is incredible topped with sliced bananas and a drizzle of honey. Meanwhile, the brownie mug cake becomes even more decadent with a scoop of vanilla ice cream melting over the top.
For the chocolate mug cake, I often add a dollop of whipped cream and fresh raspberries. The tartness of the berries cuts through the rich chocolate beautifully. Furthermore, the coffee cake mug dessert is perfect alongside a cup of hot coffee or tea for an afternoon treat.
Creative Toppings for Mug Desserts
I’ve experimented with countless toppings for these mug desserts over the years. Crushed cookies, chopped nuts, caramel sauce, and chocolate syrup all work beautifully. Additionally, fresh fruit like strawberries or blueberries adds color and freshness. For a more sophisticated presentation, I sometimes dust the finished dessert with powdered sugar or cocoa powder.
Storing and Reheating Mug Desserts
While these desserts are designed to be enjoyed immediately, I’ve successfully stored and reheated them when necessary. If you need to make them ahead, allow the mug cake to cool completely, then cover it tightly with plastic wrap. They’ll keep in the refrigerator for up to 2 days.
To reheat, microwave for 15-20 seconds until just warm. Be careful not to overheat, as this can make the texture rubbery. Alternatively, you can eat refrigerated mug cakes cold, though they won’t be quite as tender as when freshly made.
Troubleshooting Common Mug Dessert Problems
Over the years, I’ve encountered virtually every possible mug dessert mishap and learned how to prevent them. If your mug cake overflows during cooking, your mug was too small or you filled it too full. Remember, the batter should never exceed two-thirds of the mug’s capacity to allow room for rising.
A rubbery texture indicates overcooking. Reduce your microwave time by 10-15 seconds next time. Conversely, if your mug dessert is gooey and undercooked in the center, increase the cooking time in 10-second increments until it’s properly set.
Preventing Dry Mug Cakes
Dry, crumbly mug cakes result from too much flour or too little liquid. Ensure you’re measuring accurately—I always use measuring spoons rather than regular silverware for precision. Additionally, different flour brands can have varying absorption rates, so you may need to add a splash more milk if your batter seems particularly thick.
Adapting Mug Desserts for Dietary Restrictions
I’ve successfully adapted these mug dessert recipes for various dietary needs. For gluten-free versions, I substitute the all-purpose flour with a 1:1 gluten-free baking blend. The texture is slightly different but still delicious. Additionally, almond flour works well in the chocolate and brownie versions, though it creates a denser, more moist cake.
For dairy-free adaptations, I use almond milk or oat milk in place of regular milk with excellent results. Coconut oil substitutes well for butter, adding a subtle tropical flavor that complements the chocolate beautifully. Furthermore, these substitutions don’t significantly affect cooking times.
Creative Flavor Variations for Mug Desserts
Once you’ve mastered the basic recipes, experimenting with flavors becomes incredibly fun. I’ve added everything from chai spices to orange zest to these mug desserts with delicious results. The chocolate mug cake is particularly versatile, accepting mix-ins like crushed Oreos, mint extract, or even a spoonful of Nutella swirled through the batter.
The peanut butter mug cake is amazing with the addition of banana slices pressed into the batter before cooking. I’ve also made it with almond butter for a different nutty flavor profile. Meanwhile, the coffee cake can be enhanced with a handful of blueberries or a sprinkle of chopped pecans in the batter.
Seasonal Mug Dessert Adaptations
I love adapting these recipes for different seasons. In fall, I add pumpkin pie spice to the coffee cake and fold in some canned pumpkin. During winter, peppermint extract and crushed candy canes transform the chocolate mug cake into a festive treat. Furthermore, in summer, I incorporate fresh berries and lemon zest for bright, seasonal flavors.
The Perfect Occasions for Mug Desserts
These mug desserts have proven themselves invaluable for countless occasions in my life. They’re perfect for late-night study sessions, satisfying sweet cravings without creating a sink full of dishes. Moreover, I’ve made them during power outages when my oven wasn’t available but I still wanted something homemade and comforting.
They’re also wonderful for teaching children basic baking skills. The quick cooking time keeps kids engaged, and the individual portions mean everyone can make exactly what they want. Additionally, mug desserts are ideal for dorm rooms and small kitchens where full-scale baking isn’t practical.
Pairing Beverages with Mug Desserts
The right beverage can elevate these simple mug desserts into a complete experience. I find that the peanut butter mug cake pairs beautifully with cold milk, which cuts through the richness and enhances the nutty flavor. Meanwhile, both chocolate versions are incredible alongside hot coffee, with the bitterness of the coffee balancing the sweetness of the cake.
For the coffee cake mug dessert, I prefer hot tea—particularly Earl Grey or English Breakfast. The tannins in the tea complement the cinnamon and brown sugar beautifully. Furthermore, for a more indulgent experience, hot chocolate or a mocha makes any of these mug desserts feel extra special.
My Personal Mug Dessert Philosophy
After years of making these quick microwave treats, I’ve come to appreciate how they perfectly balance convenience with quality. While I still love traditional baking, these mug desserts fill a unique niche in my cooking repertoire. They prove that homemade doesn’t have to mean time-consuming, and that single servings can be just as satisfying as full batches.
What I love most about these recipes is how they’ve made spontaneous baking accessible. I no longer need to plan ahead or commit significant time to enjoy fresh, warm dessert. Moreover, they’ve helped me practice portion control while still indulging my sweet tooth. The psychological satisfaction of making something from scratch, even if it only takes a minute, shouldn’t be underestimated.
These four mug desserts represent everything I value in recipes: simplicity, reliability, and deliciousness. Whether you’re baking for yourself after a long day or surprising someone special with a warm treat, these recipes deliver every single time.