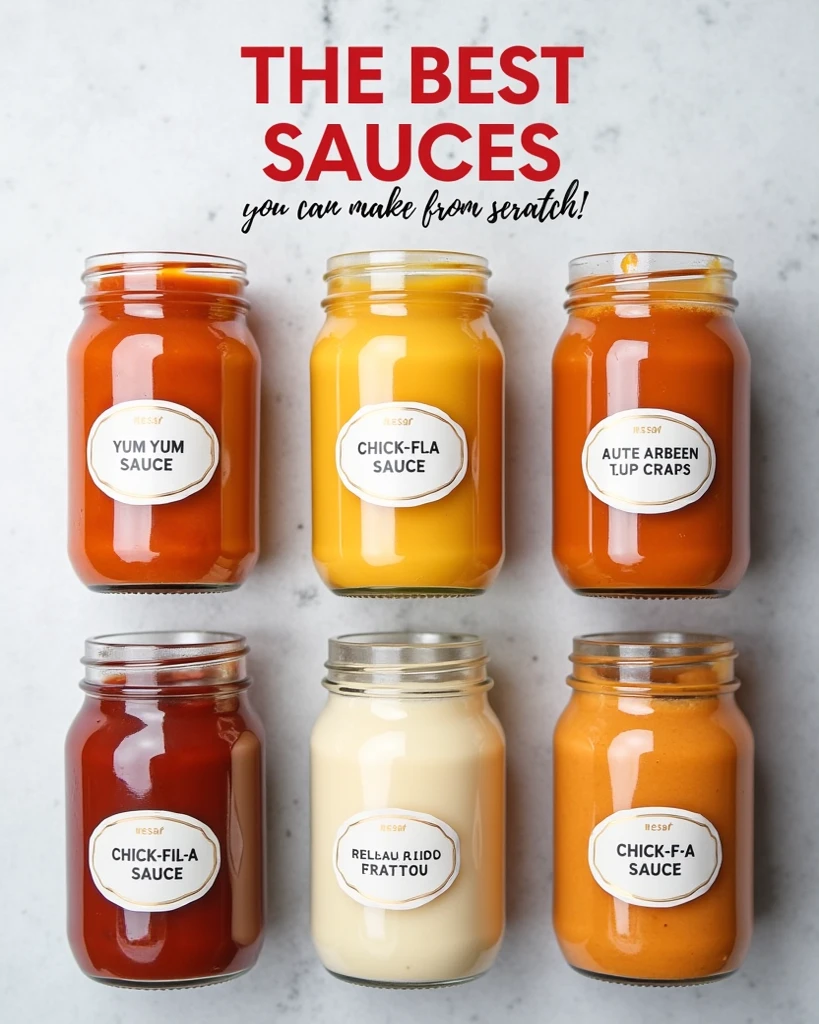
I still remember the moment I realized how easy it was to make restaurant-quality sauces at home. I was attempting to recreate my favorite Chick-fil-A sauce for a chicken sandwich dinner, and within five minutes, I had whipped up something that tasted remarkably close to the original. That small victory opened up a whole new world of cooking for me. Since then, I’ve mastered dozens of sauce recipes, but these six remain my absolute favorites—the ones I make over and over again.
What makes these homemade sauces so special is how they transform ordinary meals into something extraordinary. Moreover, when you make sauces from scratch, you control every ingredient, adjusting flavors to your exact preferences and avoiding preservatives and artificial ingredients. These six recipes have become staples in my kitchen, elevating everything from grilled chicken to French fries to pasta dishes.
Why Homemade Sauces Are Game-Changers
After years of making my own sauces, I can confidently say they’ve revolutionized my cooking. Store-bought sauces are convenient, but they often contain high amounts of sodium, sugar, and ingredients I can’t pronounce. Furthermore, they rarely taste as fresh and vibrant as homemade versions, which can be customized precisely to your taste.
The cost savings are substantial as well. A bottle of specialty sauce can cost five to eight dollars and might contain ingredients you’d never use in home cooking. Meanwhile, these homemade sauces use pantry staples you likely already have, creating restaurant-quality results for just pennies per serving. Additionally, making sauces from scratch means you always know exactly what you’re eating.
Understanding the Foundation of Great Sauces
Creating exceptional homemade sauces requires understanding the basic principles that make them work. Most sauces achieve balance through the interplay of fat, acid, salt, and sweetness. The mayonnaise or butter provides richness, vinegar or citrus adds brightness, salt enhances all flavors, and sugar balances acidity.
I’ve learned that the quality of your base ingredients significantly impacts the final sauce. Using real mayonnaise rather than salad dressing, fresh garlic instead of powder, and quality mustard makes noticeable differences in these recipes. Moreover, allowing sauces to rest for at least thirty minutes before serving lets flavors meld and develop, creating more complex and satisfying results.
The Importance of Proper Emulsification
Many of these homemade sauces rely on emulsification—the process of combining ingredients that don’t naturally mix, like oil and vinegar. Whisking vigorously or using a blender creates stable emulsions that give sauces their smooth, creamy texture. I’ve found that adding ingredients gradually while mixing constantly produces the best results.
Additionally, temperature affects emulsion stability. Cold ingredients emulsify more easily than warm ones, so I always start with refrigerated mayonnaise and other dairy products when making these sauces. Furthermore, if a sauce breaks or separates, whisking in a teaspoon of cold water often brings it back together.
Essential Ingredients for Yum Yum Sauce
For the Yum Yum Sauce:
- 1 cup mayonnaise
- 4 tablespoons water
- 2½ tablespoons ketchup
- 2 tablespoons granulated sugar
- 1 tablespoon melted butter
- 1½ teaspoons onion powder
- 1½ teaspoons garlic powder
- 1 teaspoon sweet Hungarian paprika
This Yum Yum sauce has become my most-requested homemade sauce. It’s that creamy, slightly sweet, tangy sauce served at Japanese steakhouses, and it’s absolutely perfect with chicken, shrimp, vegetables, or even as a salad dressing. Moreover, it comes together in just minutes and keeps well in the refrigerator for up to two weeks.
Achieving the Perfect Yum Yum Sauce Consistency
The consistency of Yum Yum sauce should be pourable but not runny—thick enough to coat food without running off completely. I’ve found that the water-to-mayonnaise ratio in this recipe creates the ideal texture. However, if you prefer a thicker sauce for dipping, reduce the water to 3 tablespoons. Conversely, for a thinner drizzling sauce, add another tablespoon of water to this homemade sauce recipe.
Step-by-Step Instructions for Yum Yum Sauce
Step 1: In a medium bowl, combine the mayonnaise, water, and ketchup. Whisk these together until completely smooth and uniform in color. This forms the creamy base of your Yum Yum sauce.
Step 2: Add the granulated sugar and melted butter to the mixture. Whisk vigorously until the sugar dissolves completely and the butter is fully incorporated. The sauce should look glossy and smooth.
Step 3: Add the onion powder, garlic powder, and paprika. Whisk thoroughly to distribute the spices evenly throughout the sauce. Make sure there are no clumps of powder visible in your homemade sauce.
Step 4: Cover and refrigerate the Yum Yum sauce for at least 30 minutes before serving. This resting time allows the flavors to meld and develop, creating a more complex and delicious sauce. The sauce will also thicken slightly as it chills.
Creating Authentic Chick-fil-A Sauce at Home
For the Chick-fil-A Sauce:
- 2 tablespoons yellow mustard
- 2 tablespoons barbecue sauce
- ½ cup mayonnaise
- 1 tablespoon honey
- 1 tablespoon lemon juice
- ⅛ teaspoon garlic powder
This copycat Chick-fil-A sauce might be my proudest achievement in homemade sauce making. It tastes remarkably similar to the original, combining tangy mustard, sweet honey, and smoky barbecue sauce into something magical. Furthermore, it’s incredibly versatile—amazing with chicken nuggets, fries, sandwiches, or even as a burger spread.
Selecting the Right Barbecue Sauce
The type of barbecue sauce you use significantly impacts the final flavor of this homemade Chick-fil-A sauce. I prefer using a sweet, tomato-based barbecue sauce like Sweet Baby Ray’s, which closely matches the flavor profile of the original. Avoid heavily smoked or vinegar-forward barbecue sauces, as they’ll overpower the other flavors in this delicate balance.
Mastering the Chick-fil-A Sauce Recipe
Step 1: In a small bowl, whisk together the yellow mustard and barbecue sauce until well combined. These two ingredients form the flavor foundation of this beloved sauce.
Step 2: Add the mayonnaise and whisk until the mixture is smooth and uniform in color. The sauce should be creamy with no streaks of mustard or barbecue sauce visible.
Step 3: Stir in the honey, lemon juice, and garlic powder. Whisk thoroughly to ensure the honey dissolves completely and all ingredients are evenly distributed throughout the sauce.
Step 4: Transfer the Chick-fil-A sauce to an airtight container and refrigerate for at least 1 hour before serving. This resting period is crucial—the flavors need time to marry and develop that authentic taste we’re after.
Preparing Classic Olive Garden Alfredo Sauce
For the Olive Garden Alfredo Sauce:
- 6 tablespoons unsalted butter
- 1 tablespoon garlic powder
- 2½ cups heavy cream
- 1 cup all-purpose flour
- 1½ cups whole milk
- 1 cup freshly grated Parmesan cheese
- 1⅓ cups whipping cream (for thinning)
- 16 oz fettuccine noodles (for serving)
This Alfredo sauce recipe produces a rich, creamy sauce that rivals Olive Garden’s famous version. I’ve served this at countless dinner parties, and guests always assume it’s much more difficult to make than it actually is. Moreover, fresh Alfredo sauce tastes incomparably better than jarred versions, with a silky texture and pure, clean flavor.
The Secret to Smooth Alfredo Sauce
The key to lump-free Alfredo sauce lies in how you incorporate the flour. I’ve learned that whisking the flour into the butter and garlic mixture before adding liquids prevents clumping. Additionally, adding the cream gradually while whisking constantly ensures smooth integration. Furthermore, using freshly grated Parmesan cheese rather than pre-grated produces superior results—pre-grated cheese contains anti-caking agents that can make your sauce grainy.
Creating Restaurant-Quality Alfredo Sauce
Step 1: In a large saucepan over medium heat, melt the butter completely. Once melted, add the garlic powder and whisk to combine, cooking for about 30 seconds until fragrant.
Step 2: Add the flour to the butter mixture and whisk vigorously to create a smooth paste (called a roux). Cook this roux for 1-2 minutes, whisking constantly, until it’s lightly golden and smells nutty. This step is crucial for eliminating the raw flour taste from your Alfredo sauce.
Step 3: Gradually pour in the heavy cream while whisking constantly. Add it slowly at first—just a splash at a time—whisking thoroughly between additions. This gradual incorporation prevents lumps and creates a silky smooth base for your homemade sauce.
Step 4: Add the whole milk and continue whisking until the mixture is completely smooth. Bring the sauce to a gentle simmer, stirring frequently to prevent scorching on the bottom of the pan.
Step 5: Reduce heat to low and stir in the freshly grated Parmesan cheese. Add it gradually, stirring after each addition until the cheese melts completely. The sauce will thicken considerably as the cheese melts.
Step 6: If the Alfredo sauce becomes too thick, thin it with the whipping cream, adding a little at a time until you achieve your desired consistency. The sauce should coat the back of a spoon but still pour easily.
Step 7: Toss with freshly cooked fettuccine noodles and serve immediately. Alfredo sauce is best enjoyed fresh, as it thickens significantly upon standing and doesn’t reheat as well as other sauces.
Crafting Perfect Chicken Finger Dipping Sauce
For the Chicken Finger Dipping Sauce:
- ½ cup mayonnaise
- ⅓ cup ketchup
- ½ teaspoon garlic salt
- 1 teaspoon black pepper
- ½ teaspoon hot sauce (Cholula)
- ½ teaspoon Worcestershire sauce
This chicken finger dipping sauce is incredibly simple yet absolutely addictive. I created it trying to replicate the sauce from my favorite local chicken restaurant, and it’s now requested at every family gathering. Moreover, it’s fantastic with chicken tenders, nuggets, fries, onion rings, or even as a burger spread.
Adjusting Heat Levels in Dipping Sauce
The beauty of making your own chicken finger dipping sauce is controlling the spice level precisely. This recipe creates a mild sauce with just a hint of heat. However, if you prefer spicier food, increase the hot sauce to a full teaspoon or add a pinch of cayenne pepper. Conversely, for completely mild sauce, simply omit the hot sauce—the other flavors still create a delicious result.
Mixing the Ultimate Dipping Sauce
Step 1: In a small bowl, combine the mayonnaise and ketchup. Whisk together until the mixture is smooth and uniformly pink with no streaks.
Step 2: Add the garlic salt, black pepper, hot sauce, and Worcestershire sauce. Whisk thoroughly to distribute the seasonings evenly throughout the sauce.
Step 3: Taste and adjust seasonings if desired. I sometimes add an extra dash of Worcestershire sauce for more depth or additional black pepper for extra kick in this homemade dipping sauce.
Step 4: Cover and refrigerate for at least 30 minutes before serving. This resting time allows the flavors to blend beautifully. The sauce keeps well refrigerated for up to one week.
Making Irresistible Honey Mustard Sauce
For the Honey Mustard Sauce:
- ¾ cup mayonnaise
- 3 tablespoons yellow mustard
- 3 tablespoons honey
- 2 tablespoons apple cider vinegar
- 1 tablespoon granulated sugar
- 2 teaspoons paprika
- ¼ teaspoon garlic powder
- ¼ teaspoon salt
This honey mustard sauce strikes the perfect balance between sweet and tangy. I use it constantly—on salads, as a chicken marinade, with pretzels, or alongside sandwiches. Furthermore, it’s one of the most versatile sauces I make, working equally well as a condiment, dipping sauce, or salad dressing.
Balancing Sweetness in Honey Mustard
The honey-to-mustard ratio in this sauce creates a balanced flavor that’s neither too sweet nor too sharp. However, honey varieties differ in sweetness intensity. If you’re using a particularly sweet honey like clover, you might want to reduce it to 2½ tablespoons. Conversely, if using a less sweet variety like buckwheat honey, the full 3 tablespoons works perfectly in this homemade sauce.
Perfecting Your Honey Mustard Sauce
Step 1: In a medium bowl, whisk together the mayonnaise and yellow mustard until completely combined and smooth.
Step 2: Add the honey and whisk vigorously until it’s fully incorporated. The honey can be stubborn about mixing, so be patient and whisk thoroughly to ensure even distribution in your sauce.
Step 3: Add the apple cider vinegar and sugar, whisking until the sugar dissolves completely. The vinegar adds brightness and prevents the sauce from being cloying.
Step 4: Stir in the paprika, garlic powder, and salt. Whisk until all seasonings are evenly distributed and no clumps remain in the honey mustard sauce.
Step 5: Cover and refrigerate for at least 1 hour before serving. This sauce actually improves with time—I often make it the night before I plan to use it for even better flavor development.
Creating Tangy Sweet and Sour Sauce
For the Sweet and Sour Sauce:
- 6 oz pineapple juice
- ⅓ cup water
- 1 teaspoon soy sauce
- ½ cup white sugar
- ⅓ cup apple cider vinegar
- 1 tablespoon cornstarch
- 3 tablespoons water
- 1 teaspoon red food coloring (optional)
This sweet and sour sauce tastes exactly like what you’d get from your favorite Chinese restaurant. I make it whenever I’m cooking Asian-inspired dishes at home, and it transforms simple chicken or pork into something restaurant-quality. Moreover, it’s surprisingly easy to make, requiring just a few minutes of active cooking time.
Achieving Perfect Sweet and Sour Balance
The name “sweet and sour” suggests these are the only two flavors at play, but great sweet and sour sauce actually balances sweet, sour, and savory notes. The pineapple juice provides fruity sweetness and acidity, while the soy sauce adds essential umami depth. I’ve found that this balance is what makes homemade sweet and sour sauce so much better than most bottled versions.
Cooking Traditional Sweet and Sour Sauce
Step 1: In a medium saucepan, combine the pineapple juice, ⅓ cup water, soy sauce, sugar, and apple cider vinegar. Whisk together until the sugar begins to dissolve.
Step 2: Place the saucepan over medium-high heat and bring the mixture to a boil, stirring occasionally. Once boiling, reduce the heat to medium and let it simmer for 2-3 minutes.
Step 3: While the sauce simmers, prepare your cornstarch slurry. In a small bowl, whisk together the cornstarch and 3 tablespoons water until completely smooth with no lumps.
Step 4: Slowly pour the cornstarch slurry into the simmering sauce while whisking constantly. The sauce will begin thickening immediately. Continue cooking and stirring for 1-2 minutes until the sauce reaches a glossy, syrupy consistency.
Step 5: If desired, stir in the red food coloring to achieve that characteristic bright color. This is purely aesthetic—the sauce tastes the same without it, but the color makes it look more authentic.
Step 6: Remove from heat and let the sweet and sour sauce cool slightly before using. It will thicken more as it cools. Store any leftover sauce in the refrigerator for up to two weeks.
Pro Tips for Perfect Homemade Sauces
After making these sauces countless times, I’ve developed several techniques that ensure consistent, delicious results. First, always measure ingredients accurately—sauce recipes are more precise than many other types of cooking. A tablespoon too much or too little of a key ingredient can throw off the entire balance of flavors in your homemade sauce.
Moreover, I’ve learned that using room-temperature ingredients helps them blend more smoothly. I take my mayonnaise, butter, and other refrigerated items out about fifteen minutes before making sauces. Additionally, tasting and adjusting seasonings is crucial—every brand of mayonnaise, mustard, or ketchup tastes slightly different, so you may need to tweak recipes to achieve your perfect balance.
Storage and Shelf Life for Homemade Sauces
Proper storage extends the life of these homemade sauces significantly. I always store them in clean, airtight containers—glass jars work particularly well. Most of these sauces keep refrigerated for 1-2 weeks, though the Alfredo sauce is best used within 3-4 days due to its dairy content.
Furthermore, I always label my containers with the sauce name and date made. This simple practice prevents confusion and ensures I use sauces while they’re still fresh. Additionally, if a sauce develops an off smell or appearance, discard it immediately—homemade sauces lack the preservatives that extend store-bought shelf life.
Nutritional Information for Homemade Sauces
Yum Yum Sauce (per 2 tablespoon serving):
- Calories: 95
- Total Fat: 10g
- Saturated Fat: 2g
- Cholesterol: 5mg
- Sodium: 85mg
- Total Carbohydrates: 3g
- Sugars: 2g
- Protein: 0g
Chick-fil-A Sauce (per 2 tablespoon serving):
- Calories: 110
- Total Fat: 11g
- Saturated Fat: 2g
- Cholesterol: 8mg
- Sodium: 140mg
- Total Carbohydrates: 4g
- Sugars: 3g
- Protein: 0g
Olive Garden Alfredo Sauce (per ½ cup serving):
- Calories: 385
- Total Fat: 36g
- Saturated Fat: 22g
- Cholesterol: 115mg
- Sodium: 420mg
- Total Carbohydrates: 12g
- Sugars: 2g
- Protein: 8g
Chicken Finger Dipping Sauce (per 2 tablespoon serving):
- Calories: 85
- Total Fat: 9g
- Saturated Fat: 1g
- Cholesterol: 5mg
- Sodium: 180mg
- Total Carbohydrates: 2g
- Sugars: 2g
- Protein: 0g
Honey Mustard Sauce (per 2 tablespoon serving):
- Calories: 105
- Total Fat: 10g
- Saturated Fat: 2g
- Cholesterol: 6mg
- Sodium: 95mg
- Total Carbohydrates: 5g
- Sugars: 4g
- Protein: 0g
Sweet and Sour Sauce (per ¼ cup serving):
- Calories: 75
- Total Fat: 0g
- Saturated Fat: 0g
- Cholesterol: 0mg
- Sodium: 125mg
- Total Carbohydrates: 19g
- Sugars: 17g
- Protein: 0g
Creative Uses for Homemade Sauces
These sauces are far more versatile than their traditional uses suggest. I’ve discovered countless creative applications that make them even more valuable in my kitchen. The Yum Yum sauce, for example, makes an incredible base for Asian-inspired slaws or as a drizzle over rice bowls.
The Chick-fil-A sauce isn’t just for chicken—I’ve used it as a sandwich spread, burger topping, and even mixed into potato salad for extra flavor. Furthermore, the Alfredo sauce becomes an amazing pizza sauce or casserole base. The honey mustard works beautifully as a glaze for roasted vegetables or salmon.
Transforming Sauces Into Marinades
Many of these homemade sauces double as excellent marinades with minor adjustments. I thin the honey mustard sauce with a little olive oil and use it to marinate chicken or pork before grilling. Similarly, the sweet and sour sauce makes a fantastic marinade for chicken wings or ribs.
The Yum Yum sauce becomes an incredible marinade for shrimp when combined with a tablespoon of lime juice. These versatile applications mean one batch of sauce can serve multiple purposes throughout the week, maximizing both flavor and efficiency in your kitchen.
Pairing Sauces with Specific Foods
While these sauces work with many foods, certain pairings are absolutely perfect. The Yum Yum sauce is my go-to for hibachi-style meals—grilled chicken, shrimp, fried rice, and vegetables all benefit from its creamy, tangy flavor. Additionally, it’s exceptional as a salad dressing, particularly on Asian-inspired salads with cabbage and mandarin oranges.
The Chick-fil-A sauce pairs beautifully with anything fried—chicken tenders, French fries, onion rings, or fried pickles. However, I’ve also discovered it’s fantastic on grilled chicken sandwiches or as a dip for fresh vegetables. Furthermore, the Alfredo sauce obviously pairs with pasta, but it’s also wonderful over grilled chicken breast or as a dipping sauce for breadsticks.
Teaching Others to Make Homemade Sauces
I’ve taught dozens of friends and family members to make these sauces, and it’s always rewarding to see their excitement when they realize how easy it is. The recipes are straightforward enough for beginners yet produce impressive results that make people feel accomplished. Moreover, sauce-making is a low-stakes introduction to cooking since mistakes are easily corrected and the time investment is minimal.
I always encourage new sauce-makers to start with the Yum Yum sauce or honey mustard, as they’re the most forgiving and require no cooking. Once someone masters these, they gain confidence to tackle the Alfredo sauce or sweet and sour sauce, which involve cooking techniques like making a roux or cornstarch slurry.
Troubleshooting Common Sauce Problems
Over the years, I’ve encountered virtually every sauce-making problem and learned solutions for each. If your mayonnaise-based sauces seem too thick, simply whisk in water or milk one teaspoon at a time until you achieve the desired consistency. Conversely, if they’re too thin, add more mayonnaise gradually.
For the Alfredo sauce, if it becomes grainy, the heat was too high or the cheese was added too quickly. Prevention is easier than fixing, but whisking in a tablespoon of heavy cream can sometimes smooth out minor graininess. Additionally, if your sweet and sour sauce doesn’t thicken properly, you likely didn’t make the cornstarch slurry correctly—it must be completely smooth before adding to the hot liquid.
Adjusting Flavors in Homemade Sauces
Sometimes sauces need flavor adjustments even when you’ve followed recipes precisely. If a sauce tastes flat, add salt incrementally—salt is a flavor enhancer that brings out other ingredients’ natural flavors. However, if a sauce is too salty, adding a pinch of sugar often balances it without making the sauce noticeably sweet.
For sauces that taste too acidic or vinegary, sugar or honey counteracts the sharpness. Meanwhile, if a sauce seems too sweet, a squeeze of lemon juice or splash of vinegar adds brightness and balance. These adjustments have saved many batches of sauce in my kitchen.
Making Sauces in Advance
Most of these homemade sauces benefit from being made ahead, allowing flavors time to develop and meld. I typically make the Yum Yum sauce, Chick-fil-A sauce, honey mustard, and chicken finger dipping sauce at least a few hours before serving, though they’re even better the next day.
The sweet and sour sauce can be made up to two weeks ahead and reheated gently when needed. However, the Alfredo sauce is best made fresh and served immediately. If you must make it ahead, prepare it up to the point before adding cheese, then refrigerate. When ready to serve, reheat gently and stir in the Parmesan cheese.
My Personal Sauce-Making Philosophy
After years of creating homemade sauces, I’ve developed a deep appreciation for how they elevate everyday cooking. These six recipes have become so integral to my meal planning that I can barely imagine cooking without them. Moreover, they’ve taught me that restaurant-quality food is absolutely achievable at home with simple techniques and quality ingredients.
What I love most about making sauces from scratch is the control it gives me. I can adjust sweetness, heat, and consistency precisely to my family’s preferences. Furthermore, knowing exactly what’s in my food provides peace of mind that store-bought alternatives simply can’t match. The small time investment yields enormous returns in flavor, health, and satisfaction.
These sauces represent the perfect gateway into more adventurous home cooking. They’re simple enough to build confidence yet impressive enough to make you feel like a culinary wizard. Whether you’re drizzling Yum Yum sauce over vegetables or tossing pasta with fresh Alfredo, making your own sauces transforms ordinary meals into something truly special.
SEO Optimization Block
Focus keyphrase: Homemade Sauce Recipes
SEO title: 6 Best Homemade Sauces You Can Make From Scratch
Slug: best-homemade-sauce-recipes-from-scratch
Keyphrase synonyms: easy sauce recipes, copycat sauce recipes, homemade condiments, make your own sauces, restaurant sauce recipes, DIY sauces
Meta description: Make six amazing homemade sauces from scratch including Yum Yum, Chick-fil-A, Alfredo, and honey mustard sauce recipes!