When I first made peanut butter and jelly cookies, I was transported back to my childhood lunchbox days. These delightful treats capture everything we love about the classic PB&J sandwich in cookie form. Moreover, they’ve become my most-requested recipe, combining the comforting flavors of peanut butter with sweet jelly in a soft, tender cookie that melts in your mouth.
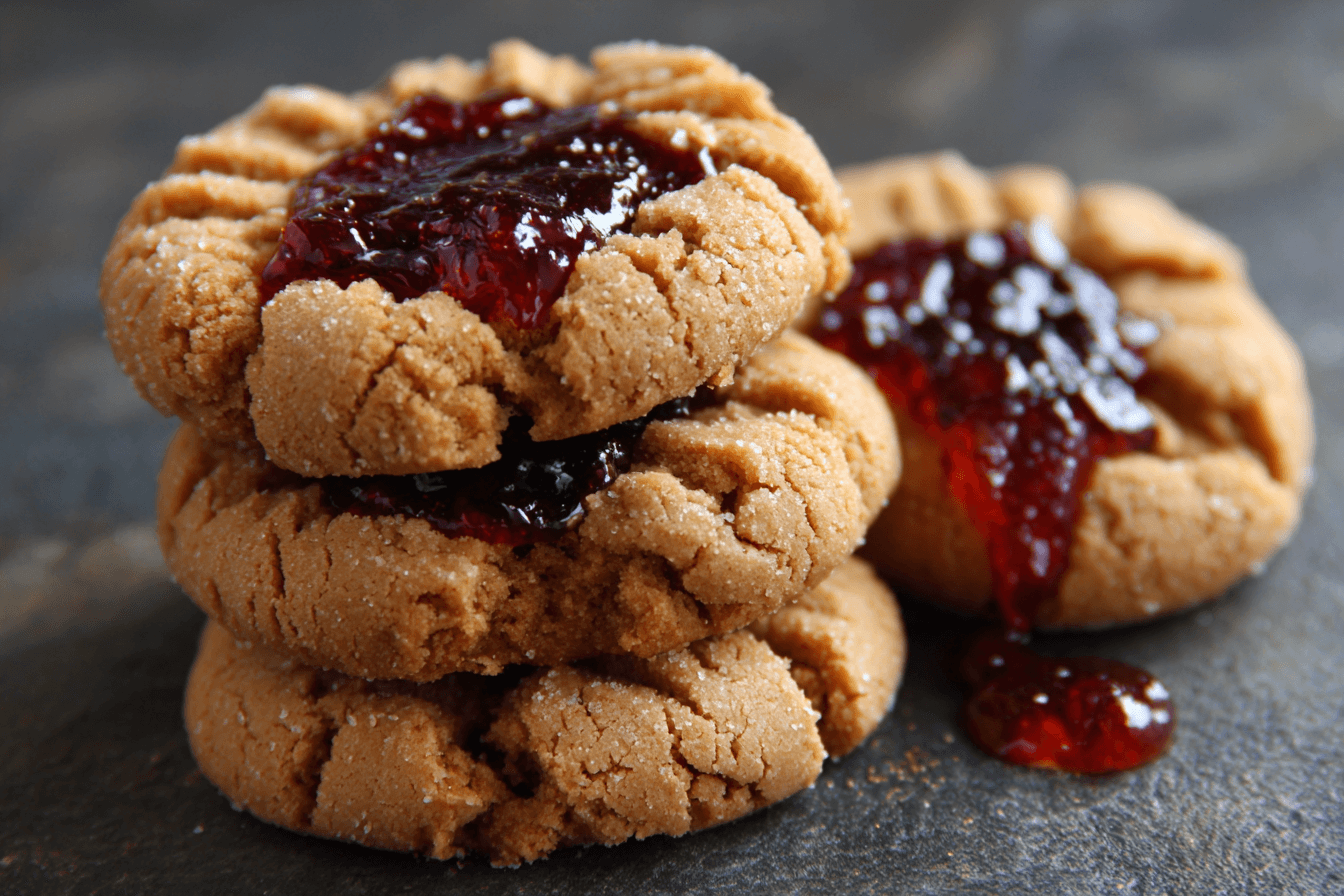
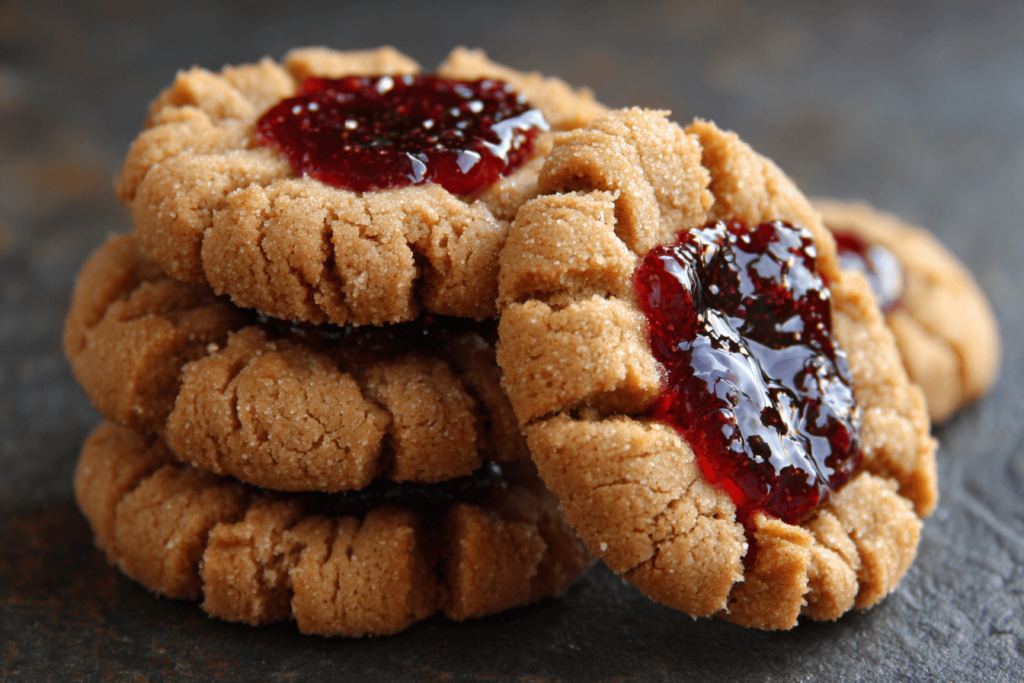
The inspiration for these peanut butter and jelly cookies came from wanting to recreate a beloved childhood flavor in a more sophisticated form. I experimented with countless batches, adjusting ratios and techniques until I achieved the perfect balance. Consequently, these cookies feature a tender, slightly crumbly texture with beautiful crackled tops and jewel-toned jelly centers that make them as visually appealing as they are delicious.
What Makes Peanut Butter and Jelly Cookies Irresistible
The magic of peanut butter and jelly cookies lies in their perfect marriage of flavors and textures. Unlike regular peanut butter cookies, these feature a thumbprint filled with your favorite jelly or jam. Additionally, the rich, nutty peanut butter base provides the perfect canvas for the sweet-tart fruit filling, creating a harmonious balance in every bite.
What truly sets these peanut butter and jelly cookies apart is their texture. The edges are slightly crisp while the centers remain incredibly soft and tender. Furthermore, rolling the dough in sugar before baking creates a sparkly coating that adds subtle crunch and visual appeal. The crackled surface that develops during baking gives these cookies a homemade, rustic charm that you simply cannot replicate with store-bought varieties.
Essential Ingredients for Perfect Peanut Butter and Jelly Cookies
Creating exceptional peanut butter and jelly cookies requires quality ingredients and proper ratios. Each component plays a crucial role in achieving the signature texture and flavor. Therefore, I recommend investing in good peanut butter and high-quality preserves for the best results.
Cookie Dough:
- 1 3/4 cups all-purpose flour
- 1 teaspoon baking soda
- 1/2 teaspoon baking powder
- 1/4 teaspoon salt
- 1/2 cup unsalted butter, softened
- 1/2 cup creamy peanut butter
- 1/2 cup granulated sugar
- 1/2 cup packed light brown sugar
- 1 large egg
- 1 teaspoon vanilla extract
- 1/4 cup milk
For Rolling and Filling:
- 1/2 cup granulated sugar
- 3/4 cup grape, strawberry, or raspberry jelly/jam
The type of peanut butter you choose significantly impacts your peanut butter and jelly cookies. I recommend using commercial creamy peanut butter like Jif or Skippy rather than natural varieties. Natural peanut butter contains more oil, which can make the cookies spread excessively. Meanwhile, commercial brands provide consistent results and the nostalgic flavor we associate with classic PB&J.
For the jelly filling in peanut butter and jelly cookies, grape jelly offers the most traditional flavor. However, strawberry and raspberry preserves create beautiful color contrasts and add sophistication. Choose preserves with visible fruit pieces for added texture and authentic fruit flavor that elevates these cookies beyond simple childhood nostalgia.
Step-by-Step Guide to Making Peanut Butter and Jelly Cookies
Preparing Your Ingredients and Workspace
Before beginning your peanut butter and jelly cookies, proper preparation ensures smooth execution. First, preheat your oven to 350°F (175°C). Then, line two large baking sheets with parchment paper or silicone baking mats. This prevents sticking and promotes even browning on the bottom of your cookies.
Next, bring your butter and egg to room temperature. This step is essential because room-temperature ingredients blend more smoothly, creating a cohesive dough. Cold ingredients can result in a grainy texture in your peanut butter and jelly cookies. Additionally, measure your peanut butter accurately—too much makes cookies dense, while too little means they’ll lack that signature peanut butter flavor.
Creating the Perfect Cookie Dough
The foundation of exceptional peanut butter and jelly cookies begins with proper mixing technique. In a medium bowl, whisk together flour, baking soda, baking powder, and salt. The combination of baking soda and baking powder creates the ideal rise and spread. Set this flour mixture aside while you work on the wet ingredients.
In a large bowl or stand mixer, cream together butter, peanut butter, granulated sugar, and brown sugar for 3-4 minutes until light and fluffy. This extended creaming time is crucial for peanut butter and jelly cookies because it incorporates air that creates their tender texture. Don’t rush this step—properly creamed butter and sugar make the difference between good cookies and exceptional ones.
Add the egg and vanilla extract, beating until fully incorporated. Then, add milk and mix until combined. The milk adds moisture that keeps peanut butter and jelly cookies soft for days. Subsequently, gradually add the flour mixture, mixing on low speed just until combined. Avoid overmixing, as this develops gluten and creates tough cookies rather than the tender texture you want.
Shaping and Preparing Peanut Butter and Jelly Cookies
Place your granulated sugar in a shallow bowl for rolling. Using a cookie scoop or tablespoon, portion the dough into balls about 1.5 inches in diameter. Roll each ball between your palms until smooth, then roll generously in sugar to coat completely. This sugar coating creates the signature sparkle and slight crunch on peanut butter and jelly cookies.
Arrange the sugar-coated balls on your prepared baking sheets, spacing them about 2 inches apart. These cookies spread moderately during baking, so adequate spacing prevents them from merging together. I typically fit 12 cookies per standard baking sheet for optimal results.
Creating the Jelly Indentation
Here’s where peanut butter and jelly cookies get their distinctive appearance and flavor. Before baking, use your thumb or the back of a wooden spoon to make a deep indentation in the center of each cookie. Press firmly but gently—the indentation should be about 1/2 inch deep and 3/4 inch wide.
The dough may crack slightly around the edges of the indentation, which is completely normal and adds to the homemade charm of peanut butter and jelly cookies. However, if the dough cracks excessively or feels too stiff, let it sit at room temperature for 5 minutes. Slightly warmer dough is more pliable and easier to indent without cracking.
Baking to Golden Perfection
Bake your peanut butter and jelly cookies for 11-13 minutes, rotating the pans halfway through for even baking. The cookies are done when the edges are lightly golden but the centers still look slightly soft and underdone. They’ll continue cooking on the hot pan after removal from the oven, so pulling them early ensures they remain tender.
Immediately after removing from the oven, gently re-press the indentations if they’ve puffed up during baking. This commonly happens with peanut butter and jelly cookies due to the leavening agents. The cookies are still soft and warm, making this adjustment easy. Use the back of a spoon or your thumb, being careful not to burn yourself.
Allow the cookies to cool on the baking sheet for 5 minutes before transferring to a wire rack. Once completely cool, fill each indentation with about 1 teaspoon of jelly or jam. The jelly should mound slightly above the rim for the prettiest presentation. I use a small spoon or piping bag for precise filling of peanut butter and jelly cookies.
Professional Tips for Perfect Peanut Butter and Jelly Cookies
Through countless batches of peanut butter and jelly cookies, I’ve discovered techniques that guarantee success every time. First, don’t fill the indentations before baking. While it might seem efficient, jelly bubbles and spreads during baking, creating a mess instead of neat centers. Always fill cooled cookies for clean, professional-looking results.
Second, use a cookie scoop for uniform sizing. Consistent portions ensure all your peanut butter and jelly cookies bake evenly and finish at the same time. Varied sizes mean some cookies will be overdone while others remain underbaked. A medium cookie scoop (about 1.5 tablespoons) creates the perfect size.
Third, don’t skip the sugar rolling step. While it might seem purely decorative, the sugar coating actually serves multiple purposes in peanut butter and jelly cookies. It creates a slight crunch that contrasts with the soft interior, prevents the cookies from sticking together during storage, and adds visual sparkle that makes them look bakery-worthy.
Creative Variations on Peanut Butter and Jelly Cookies
While classic peanut butter and jelly cookies are wonderful, variations keep things interesting. Try using crunchy peanut butter instead of creamy for added texture. The peanut pieces create delightful crunch throughout the cookie, though they won’t be quite as tender as the classic version.
For adults, consider using sophisticated preserves like fig jam, apricot preserves, or even pepper jelly for a sweet-spicy twist. These unexpected flavors elevate peanut butter and jelly cookies from childhood treat to elegant dessert. Similarly, adding a tablespoon of bourbon or rum to the dough creates depth that appeals to grown-up palates.
Chocolate lovers can add 1/4 cup cocoa powder to the dough, reducing flour by the same amount. These chocolate peanut butter and jelly cookies offer incredible flavor reminiscent of chocolate-covered peanut butter cups. Alternatively, press a chocolate kiss candy into the center instead of jelly for a different take on the thumbprint concept.
Storage and Make-Ahead Instructions
Proper storage keeps your peanut butter and jelly cookies fresh and tender for days. Store unfilled cookies in an airtight container at room temperature for up to one week. Add the jelly filling just before serving to prevent the cookies from becoming soggy. This approach is ideal when making peanut butter and jelly cookies for events several days away.
Alternatively, store filled peanut butter and jelly cookies in a single layer in an airtight container with parchment paper between layers. They’ll stay fresh at room temperature for 3-4 days. However, avoid stacking filled cookies without separation, as the jelly will stick and create a mess when you try to separate them.
You can freeze baked, unfilled peanut butter and jelly cookies for up to three months. Layer them with parchment paper in a freezer-safe container. Thaw at room temperature for 30 minutes, then fill with jelly. Frozen cookie dough balls also work beautifully—roll in sugar and bake directly from frozen, adding 2-3 minutes to the baking time.
Serving Suggestions for Peanut Butter and Jelly Cookies
These peanut butter and jelly cookies deserve presentation that showcases their nostalgic charm. Arrange them on a vintage platter or in a classic cookie jar for maximum visual appeal. The jewel-toned jelly centers catch the light beautifully, making these cookies as attractive as they are delicious.
For children’s parties, peanut butter and jelly cookies are always a hit. Their familiar flavors appeal to even the pickiest eaters, while the thumbprint style makes them fun and approachable. Pack them in lunch boxes as special treats, or serve them alongside cold milk for after-school snacks. Meanwhile, adults appreciate the comfort food nostalgia these cookies provide.
Create a dessert board featuring peanut butter and jelly cookies alongside other childhood favorites like chocolate chip cookies, brownies, and Rice Krispies treats. This nostalgic spread works wonderfully for casual gatherings, game nights, or family reunions. Additionally, the variety ensures everyone finds something they love.
Nutritional Information
Each peanut butter and jelly cookie (based on 36 cookies) contains approximately:
- Calories: 110
- Total Fat: 5g
- Saturated Fat: 2g
- Cholesterol: 12mg
- Sodium: 85mg
- Total Carbohydrates: 15g
- Dietary Fiber: 0.5g
- Sugars: 9g
- Protein: 2g
While peanut butter and jelly cookies are sweet treats, they provide some protein from the peanut butter. They’re comparable in nutrition to most homemade cookies while offering familiar flavors that bring joy and comfort. Enjoying one or two as part of a balanced diet is perfectly reasonable, especially when made with quality ingredients at home.
Troubleshooting Common Issues
Sometimes peanut butter and jelly cookies don’t turn out perfectly, but most issues have simple solutions. If your cookies spread too thin and flat, your butter was likely too warm, or you didn’t chill the dough enough. Next time, ensure butter is just softened (not melty), and consider chilling shaped dough balls for 15 minutes before baking.
Conversely, if peanut butter and jelly cookies remain thick and don’t spread at all, your oven temperature might be too low, or you may have added too much flour. Invest in an oven thermometer to verify accurate temperature. Additionally, measure flour by spooning it into the measuring cup and leveling off rather than scooping directly from the bag.
If the indentations disappear during baking, you didn’t press firmly enough initially. Remember to re-press them immediately after removing from the oven while they’re still hot and pliable. This ensures your peanut butter and jelly cookies maintain their signature thumbprint appearance and have proper space for the jelly filling.
Perfect Pairings with Peanut Butter and Jelly Cookies
When serving peanut butter and jelly cookies, thoughtful beverage pairings enhance the overall experience. A glass of cold whole milk creates the ultimate classic combination that appeals to all ages. The milk’s creaminess balances the cookies’ richness while providing nostalgia that takes you back to childhood lunches.
For adults, pair peanut butter and jelly cookies with coffee or espresso. The bitter notes in coffee complement the sweet jelly and rich peanut butter beautifully. Similarly, hot chocolate with marshmallows creates a comforting pairing perfect for cozy afternoons or evening treats. Meanwhile, Earl Grey tea offers a sophisticated option that won’t overwhelm the cookies’ flavors.
Consider serving peanut butter and jelly cookies with fruit smoothies or fresh fruit platters. The combination creates a more complete snack that feels substantial. Strawberry or banana smoothies work particularly well, echoing the fruity jelly filling while adding nutrition to balance the indulgence.
Making Peanut Butter and Jelly Cookies with Kids
These cookies are perfect for baking with children. The dough is forgiving and easy to work with, while the thumbprint technique allows kids to participate actively. Children love the familiar PB&J flavor and enjoy creating the indentations that make peanut butter and jelly cookies special.
Assign age-appropriate tasks to keep children engaged and safe. Younger kids can measure dry ingredients, roll dough balls in sugar, or arrange cookies on baking sheets. Older children can help with mixing, creating indentations, and filling the baked cookies with jelly. Meanwhile, adults handle oven operations and hot pan transfers for safety.
Turn the baking session into a learning opportunity. Discuss measurements, following recipes, and the science of how ingredients interact. These peanut butter and jelly cookies become more than just dessert—they’re opportunities for quality time, skill-building, and creating memories that children will cherish and hopefully pass on to their own families.
Allergy-Friendly Adaptations
While traditional peanut butter and jelly cookies contain peanuts, adaptations can accommodate various dietary needs. For those with peanut allergies, substitute sunflower seed butter, almond butter, or cashew butter in equal amounts. Each creates unique flavor profiles while maintaining the same beloved texture and appearance.
For gluten-free peanut butter and jelly cookies, use a quality gluten-free flour blend in place of all-purpose flour. Look for blends containing xanthan gum, which helps replicate the structure gluten provides. The texture may vary slightly, but they’ll still be delicious and satisfying.
Vegan versions work beautifully too. Replace butter with vegan butter alternative, use a flax egg (1 tablespoon ground flaxseed mixed with 3 tablespoons water), and substitute the milk with any plant-based milk. These adaptations ensure everyone can enjoy peanut butter and jelly cookies regardless of dietary restrictions.
The History Behind PB&J Flavor Combination
The pairing of peanut butter and jelly has been an American staple since the early 1900s. Originally a luxury combination available only to the wealthy, it became a common household staple during World War II when both ingredients were readily available and shelf-stable. This history adds depth to peanut butter and jelly cookies, connecting us to generations of Americans who found comfort in this simple flavor pairing.
Transforming the classic sandwich into cookie form brings innovation to tradition. These peanut butter and jelly cookies honor the past while offering a new way to enjoy beloved flavors. Moreover, they capture the essence of comfort food—something familiar, satisfying, and capable of transporting us back to simpler times with just one bite.
Why Homemade Beats Store-Bought
Nothing compares to homemade peanut butter and jelly cookies. Store-bought versions often contain preservatives, artificial flavors, and hydrogenated oils. When you make them yourself, you control every ingredient, ensuring quality and freshness that simply cannot be replicated by mass production.
Moreover, the process of baking peanut butter and jelly cookies fills your home with an irresistible aroma—the scent of toasted peanuts, butter, and vanilla creates an atmosphere of warmth and comfort. That experience, combined with the satisfaction of creating something beautiful with your own hands, adds value that extends far beyond taste.
Homemade peanut butter and jelly cookies also allow for customization. Adjust sweetness levels, experiment with different jelly flavors, or modify texture to your exact preferences. This flexibility means every batch can be perfect for your specific tastes, dietary needs, or occasion requirements.