Meta Description: Create an impressive Black Forest cheesecake featuring chocolate, cherries, and cream cheese perfection.
The Allure of Black Forest Cheesecake
Some dessert combinations achieve legendary status, and Black Forest cheesecake stands proudly among them. This magnificent creation takes the beloved elements of traditional Black Forest cake—chocolate, cherries, and cream—and transforms them into a cheesecake that defies expectations. Every slice reveals layers of deep chocolate flavor, swirls of creamy cheesecake, and bursts of cherry sweetness that dance on the palate.
My love affair with Black Forest cheesecake began during a winter trip to Bavaria, where I tasted the original Black Forest cake in its homeland. While that cake was extraordinary, I found myself dreaming of a denser, creamier interpretation. After returning home, I spent months developing this recipe, combining the essence of the German original with New York-style cheesecake richness.
The result exceeded my wildest expectations. This Black Forest cheesecake captures everything magical about the original while adding the luxurious creaminess that only cheesecake can provide. Furthermore, it’s become my most requested dessert for special occasions, from holiday gatherings to anniversary celebrations. Let me share every technique needed to recreate this masterpiece in your own kitchen.
Complete Ingredient List for Black Forest Cheesecake
For the Chocolate Cookie Crust
• 2 cups chocolate cookie crumbs (about 30 cookies)
• ¼ cup granulated sugar
• 6 tablespoons unsalted butter, melted
For the Cheesecake Filling
• 24 oz (3 packages) cream cheese, softened
• ¾ cup granulated sugar
• 3 large eggs, room temperature
• 1 cup sour cream
• 2 teaspoons vanilla extract
• 4 oz semi-sweet chocolate, melted and cooled
For the Cherry Topping
• 2 cans (15 oz each) dark sweet cherries, drained
• ½ cup cherry preserves
• 1 tablespoon kirsch (cherry brandy) – optional
• Fresh cherries with stems for garnish
For the Chocolate Ganache
• 6 oz semi-sweet chocolate, chopped
• ½ cup heavy cream
Step-by-Step Instructions for Black Forest Cheesecake
Creating the Chocolate Cookie Crust
Preheat your oven to 325°F (165°C) and wrap the outside of a 9-inch springform pan with heavy-duty aluminum foil. This waterproofing prevents water bath leakage during baking. In a food processor, pulse the chocolate cookies until they form fine, uniform crumbs that will pack together well. Transfer to a mixing bowl.
Stir in the sugar, then add the melted butter and mix until all crumbs are evenly moistened throughout. Press the mixture firmly into the bottom and about one inch up the sides of the prepared pan. Use a flat-bottomed measuring cup to create an even, compacted layer. Bake for 10 minutes to set the crust, then cool completely while preparing the filling.
Preparing the Creamy Cheesecake Filling
Using a stand mixer fitted with the paddle attachment, beat the softened cream cheese on medium speed until completely smooth and lump-free. This essential step requires at least five minutes of beating and frequent bowl scraping. Any lumps remaining now will persist in your finished Black Forest cheesecake, so patience here pays dividends.
Gradually add the sugar while mixing, then incorporate the eggs one at a time, beating only until each egg disappears. Overbeating incorporates excess air, which causes cracking during baking. Add the sour cream and vanilla extract, mixing just until combined. Finally, fold in the melted and cooled chocolate using a spatula, creating beautiful swirls rather than fully incorporating for visual appeal.
Baking Your Black Forest Cheesecake
Pour the filling into the prepared crust, gently smoothing the top with an offset spatula. Place the springform pan inside a larger roasting pan and carefully pour hot water into the roasting pan until it reaches about one inch up the sides. This water bath ensures gentle, even baking that prevents the edges from overcooking before the center sets properly.
Bake for 55-65 minutes until the edges are set but the center still jiggles slightly when gently shaken. Turn off the oven, crack the door open slightly, and let the cheesecake cool inside for one full hour. This gradual cooling prevents dramatic temperature changes that cause surface cracks. Remove from the water bath and refrigerate for at least eight hours before adding toppings.
Making the Cherry Topping
While the cheesecake chills overnight, prepare the cherry topping that makes Black Forest cheesecake so distinctive. Gently warm the cherry preserves in a small saucepan until loosened and pourable. Remove from heat and stir in the kirsch if using—this traditional addition adds authentic flavor but can be omitted for an alcohol-free version.
Fold the drained cherries into the warm preserves mixture, coating them evenly with the glossy glaze. Let the topping cool to room temperature before spooning onto the chilled cheesecake. The topping can be prepared up to three days ahead and refrigerated, though it should reach room temperature before using for best spreading consistency.
Creating the Glossy Chocolate Ganache
Place the chopped chocolate in a heatproof bowl. Heat the heavy cream in a small saucepan until it just begins to simmer—small bubbles will form around the edges. Pour the hot cream over the chocolate and let it sit undisturbed for three minutes. The heat transfers to the chocolate, melting it without scorching.
Starting from the center and working outward, whisk the mixture in slow circles until completely smooth and glossy. Let the ganache cool for about ten minutes until it thickens slightly but remains pourable. This ganache creates the dramatic dripping effect that makes Black Forest cheesecake so visually stunning and professionally finished.
Assembling the Final Black Forest Cheesecake
Run a thin knife around the edge of the chilled cheesecake before releasing the springform ring. Transfer the cheesecake to your serving plate carefully. Spoon the cherry topping over the center of the cheesecake, allowing some to cascade naturally over the edges. The cherries should be piled generously in the center, creating height and visual drama.
Drizzle the slightly cooled ganache over the cherries and around the edges of the cheesecake, letting it drip dramatically down the sides. Garnish with chocolate crumbles, chocolate curls, or additional chocolate shavings. Crown your Black Forest cheesecake with fresh cherries still attached to their stems for an elegant finishing touch. Refrigerate until serving time.
Nutritional Information for Black Forest Cheesecake
Per slice (based on 12 servings): Approximately 520 calories, 36g fat, 20g saturated fat, 44g carbohydrates, 32g sugar, 8g protein, 290mg sodium. This Black Forest cheesecake represents an indulgent dessert best enjoyed as an occasional treat for celebrations and special occasions.
The rich combination of cream cheese, chocolate, and cherries creates a calorie-dense dessert that delivers maximum satisfaction in every bite. Consider serving smaller slices given the richness—many guests find modest portions completely satisfying. For a slightly lighter version, substitute reduced-fat cream cheese, though texture will be marginally less creamy.
Expert Presentation Tips for Black Forest Cheesecake
Presentation elevates your Black Forest cheesecake from impressive to absolutely stunning. Use a heated knife dipped in hot water and wiped dry between cuts for clean, professional-looking slices. The heat melts through the ganache and filling smoothly rather than dragging and creating messy edges that detract from appearance.
Serve each slice on a white plate to showcase the dark chocolate and ruby red cherries dramatically. A small dollop of freshly whipped cream and an extra cherry with stem on each slice adds restaurant-quality finishing touches. Dust the plate rim with cocoa powder for elegant presentation. For photography, allow the cheesecake to sit at room temperature for ten minutes before shooting.
Perfect Beverage Pairings for Black Forest Cheesecake
The rich, complex flavor profile of Black Forest cheesecake pairs beautifully with several beverages. A robust espresso provides ideal contrast, its bitter notes cutting through the sweetness while complementing the chocolate elements. The concentrated coffee flavor creates a sophisticated pairing that enhances both components.
For wine enthusiasts, a cherry-forward Pinot Noir echoes the cherry topping while adding earthy complexity to the experience. Ruby port offers matching sweetness and complementary fruit notes. Non-alcoholic options include cherry-flavored sparkling water or hot chocolate with a hint of cherry syrup. Each pairing creates a distinct experience with this magnificent Black Forest cheesecake.
Creative Variations of Black Forest Cheesecake
While the classic version delivers perfection, creative variations offer exciting alternatives to explore. A white chocolate Black Forest cheesecake substitutes white chocolate for the dark chocolate throughout, creating beautiful color contrast with the deep red cherries. The sweeter white chocolate changes the flavor profile while maintaining the essential elements.
Seasonal adaptations work wonderfully too. During summer, use fresh sweet cherries when available for superior flavor and texture. For the holidays, add orange zest to the filling and use brandied cherries for a festive twist. Each variation honors the fundamental Black Forest cheesecake concept while offering something fresh for your guests to enjoy.
Helpful Substitutions for Dietary Needs
Accommodating dietary needs while maintaining the essence of Black Forest cheesecake requires thoughtful substitutions throughout. For a gluten-free version, use gluten-free chocolate sandwich cookies for the crust—many excellent options exist in stores today. Ensure your chocolate is certified gluten-free as some contain barley malt.
Dairy-free adaptations prove more challenging but remain possible with today’s improved alternatives. Vegan cream cheese has improved significantly and works adequately in the filling, though the texture differs slightly. Coconut cream can replace sour cream, adding subtle tropical notes. While these substitutions alter the final product somewhat, they allow more guests to enjoy this Black Forest cheesecake experience.
Expert Tips for Perfect Black Forest Cheesecake
Years of making Black Forest cheesecake have taught me several crucial techniques worth sharing. First, all ingredients should reach room temperature before beginning—cold cream cheese never beats smooth, and cold eggs don’t incorporate evenly. Set everything out at least two hours before you plan to start mixing.
The water bath may seem fussy, but it genuinely prevents cracking by maintaining even, gentle heat throughout baking. Use truly hot water—boiling is ideal—and ensure the foil wrap around your springform pan is completely waterproof. Moreover, resisting the urge to open the oven door during baking prevents temperature fluctuations that cause surface cracks.
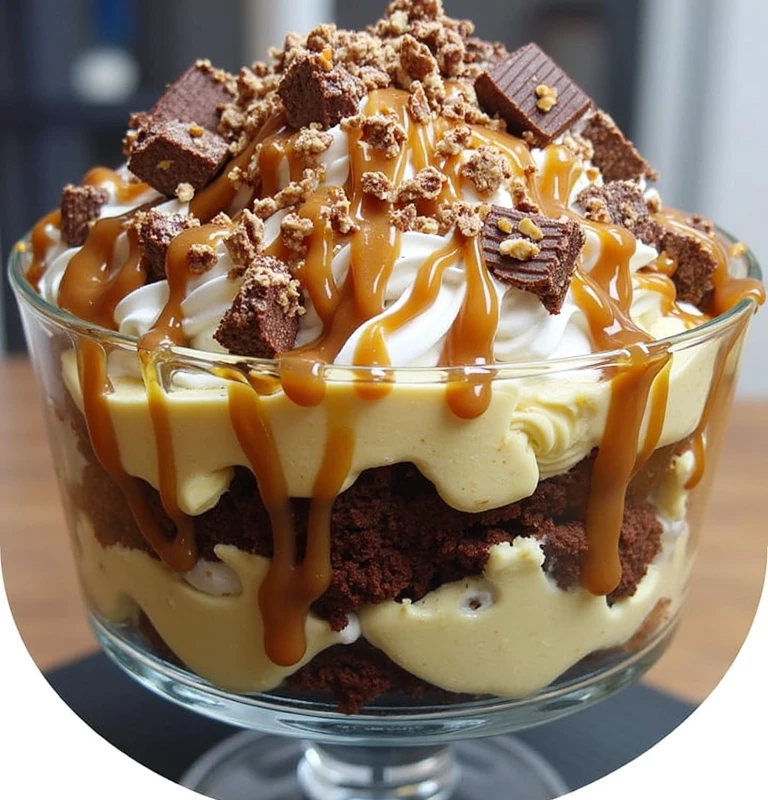
Image Description: Stunning Black Forest Cheesecake
The accompanying image showcases a magnificent Black Forest cheesecake that demands attention. The dessert features a dark chocolate cookie crust visible at the base, supporting a tall layer of creamy, pale cheesecake swirled with chocolate throughout. The top overflows with glossy, ruby-red cherries glistening under a sheen of cherry glaze that catches the light beautifully.
Rich chocolate ganache drips artistically down the sides, creating dramatic visual effect against the pale cheesecake. Fresh cherries with stems crown the creation, their deep red color contrasting with chocolate crumbles scattered across the top. A slice has been removed, revealing the stunning interior layers—dark crust, creamy filling with chocolate swirls, and cherry-topped perfection. This image perfectly captures the decadent appeal of Black Forest cheesecake.
Storage and Make-Ahead Guide for Black Forest Cheesecake
Black Forest cheesecake stores exceptionally well, making it ideal for advance preparation. The baked and cooled cheesecake (without toppings) keeps refrigerated for up to five days when tightly covered with plastic wrap. For longer storage, freeze the untopped cheesecake for up to three months. Thaw overnight in the refrigerator before adding toppings.
The cherry topping and chocolate ganache can each be made up to one week in advance and refrigerated in separate airtight containers. Allow them to reach room temperature before using—cold ganache won’t drip properly. Once fully assembled, Black Forest cheesecake stays fresh refrigerated for three to four days while maintaining excellent quality.
Conclusion: Celebrating Black Forest Cheesecake
Creating Black Forest cheesecake at home represents a labor of love that yields extraordinary rewards. This dessert commands attention on any table and creates lasting memories for those who share in its enjoyment. The combination of textures—crisp chocolate crust, velvety smooth filling, and juicy cherries—delivers a complete sensory experience.
I encourage you to attempt this Black Forest cheesecake for your next significant celebration. While the process requires time and attention, the results justify every moment of effort invested. Follow the techniques shared here, trust the process, and prepare to accept enthusiastic compliments from everyone who tastes your creation. This Black Forest cheesecake may become your signature dessert as well.
SEO Block:
Focus Keyphrase: Black Forest cheesecake
SEO Title: Black Forest Cheesecake Recipe | Chocolate Cherry Perfection
Slug: black-forest-cheesecake-recipe
Keyphrase Synonyms: cherry chocolate cheesecake, German chocolate cherry cheesecake, chocolate cherry dessert
Meta Description: Create an impressive Black Forest cheesecake featuring chocolate, cherries, and cream cheese perfection.