Picture this: It’s a hectic Wednesday evening, you’re exhausted from work, and the last thing you want to do is spend an hour in the kitchen. But you also refuse to settle for another boring sandwich or expensive takeout. Enter my secret weapon—Cheesy Garlic Chicken Wraps. These golden, crispy wraps stuffed with tender chicken, loads of melted cheese, and a punchy garlic sauce have saved my weeknight dinners more times than I can count.
I stumbled upon this recipe by happy accident one evening when I had leftover rotisserie chicken and was craving something indulgent but quick. I threw together a garlicky mayo-yogurt sauce, loaded up some tortillas with shredded chicken and cheese, and pan-fried them until crispy. That first bite was a revelation—crispy on the outside, gooey and creamy on the inside, with bold garlic flavor in every mouthful. My husband declared it better than anything we could order, and my kids actually fought over the last piece. That’s when I knew I had a winner.
Since then, I’ve refined this cheesy garlic chicken wraps recipe into a foolproof formula that works every single time. Whether you’re meal-prepping for the week, looking for a quick lunch, or need to impress someone with minimal effort, these wraps deliver. Let me walk you through everything you need to know to make the best cheesy garlic chicken wraps you’ve ever tasted.
Why These Cheesy Garlic Chicken Wraps Are Absolutely Irresistible
Quick and Easy Without Sacrificing Flavor
In less than 20 minutes from start to finish, you can have these wraps on the table. That’s faster than most delivery times, and infinitely more delicious. The secret is using pre-cooked chicken (rotisserie chicken is your best friend here), which eliminates the longest part of the cooking process.
High-Protein Powerhouse
Each wrap packs approximately 40-45 grams of protein, making these cheesy garlic chicken wraps perfect for anyone looking to increase their protein intake. Athletes, fitness enthusiasts, busy professionals, or anyone who wants to stay fuller longer—these wraps have you covered.
Customizable to Your Taste
The beauty of this recipe is its flexibility. Love extra garlic? Add more. Want it spicier? Increase the hot sauce. Prefer different cheese? Go for it. Once you master the basic technique, you can adapt these chicken wraps to match your exact preferences.
Meal Prep Champion
These wraps reheat beautifully, which makes them ideal for meal prep. I often double the recipe on Sunday and have grab-and-go lunches sorted for half the week. Just warm them up in a skillet or air fryer to restore that crispy exterior.
Essential Ingredients for Perfect Cheesy Garlic Chicken Wraps
For the Garlicky Chicken Filling
- 7 ounces (200g) cooked chicken breast or thighs, chopped or shredded (about 1.5 cups)
- 2 garlic cloves, minced or grated
- 2 tablespoons light mayonnaise
- 2 tablespoons Greek yogurt (plain, full-fat or low-fat)
- 1-2 teaspoons hot sauce (Frank’s RedHot is perfect)
- Pinch of salt
For Assembly
- 2 large flour tortillas (regular or high-protein/low-carb versions)
- 6 tablespoons shredded cheese (cheddar, mozzarella, or a Mexican blend)
- 2 tablespoons sliced green onions or chives
- Olive oil spray for cooking
Optional Add-Ins to Elevate Your Chicken Wraps
- Diced avocado for creaminess
- Sun-dried tomatoes for tangy sweetness
- Sliced black olives for briny flavor
- Fresh spinach for added nutrition
- Sautéed mushrooms for umami depth
- Pickled jalapeños for heat
Step-by-Step Guide to Making Irresistible Garlic Chicken Wraps
Preparing the Creamy Garlic Chicken Mixture
This is where the magic happens—creating that creamy, garlicky filling that makes these wraps so addictive.
Start with your chicken: If you’re using rotisserie chicken, simply shred or chop it into bite-sized pieces. Leftover grilled chicken, poached chicken breasts, or even canned chicken (in a pinch) all work perfectly. The key is having about 1.5 cups of cooked chicken ready to go.
Make the garlic sauce: In a medium bowl, combine your chopped chicken with the minced garlic, mayonnaise, Greek yogurt, hot sauce, and a pinch of salt. The combination of mayo and Greek yogurt gives you creaminess without being too heavy, plus you get extra protein from the yogurt. Mix everything together until the chicken is thoroughly coated in the creamy, garlicky goodness.
Pro tip: Let this mixture sit for 5-10 minutes if you have time. It allows the garlic flavor to permeate the chicken more deeply. I sometimes make this filling the night before and store it in the fridge, which makes assembly even faster when I’m ready to eat.
Assembling Your Cheesy Garlic Chicken Wraps
Now comes the fun part—building your wrap so it holds together perfectly and gets gorgeously crispy when cooked.
Layout your tortilla: Place a large tortilla on a clean work surface. Think of it like a clock face—you’ll be working on the lower third of the wrap.
Start with cheese: Sprinkle about 2 tablespoons of shredded cheese along the lower third of the tortilla. This layer of cheese helps hold everything together and creates that melty, gooey interior we’re after.
Add the chicken filling: Spoon approximately ⅔ cup of your garlic chicken mixture on top of the cheese. Spread it out slightly but keep it concentrated in that lower third area.
More cheese! Add another tablespoon of cheese on top of the chicken. More cheese equals more deliciousness—I don’t make the rules.
Sprinkle with green onions: Add a generous pinch of sliced green onions or chives for that fresh, sharp flavor that cuts through the richness.
The wrap technique: Here’s the trick to a wrap that doesn’t fall apart:
- Fold in both sides of the tortilla over the filling
- Fold the bottom edge up over the filling
- Roll tightly from the bottom up, keeping the sides tucked in
- The final seam should be on the bottom
Achieving the Perfect Golden, Crispy Exterior
The difference between a good wrap and a great wrap is all in the cooking technique.
Heat your pan properly: Place a non-stick skillet over medium-high heat. Let it get nice and hot before adding your wraps—you should be able to hover your hand an inch above the pan and feel the heat.
Spray with oil: Lightly spray the pan with olive oil spray. You don’t need much—just enough to promote browning and prevent sticking.
Cook seam-side down first: Place your wrapped tortilla seam-side down in the hot pan. This is crucial—it helps seal the wrap shut and prevents it from unrolling.
The lid trick: Cover the pan with a lid while cooking. This creates a mini-oven effect that helps melt the cheese inside while crisping the outside. Cook for 3-4 minutes without moving the wrap.
Flip carefully: Using a spatula, gently flip the wrap. You should see beautiful golden-brown spots. Cover again and cook for another 3-4 minutes on the second side.
Check for doneness: Your cheesy garlic chicken wrap is ready when both sides are golden and crispy, the cheese is fully melted (you might see it starting to ooze out slightly), and the wrap is heated through.
Rest before cutting: Let your wrap rest for 1-2 minutes before slicing. This allows the filling to set slightly and makes it easier to cut without everything spilling out.
Serving Your Cheesy Garlic Chicken Wraps
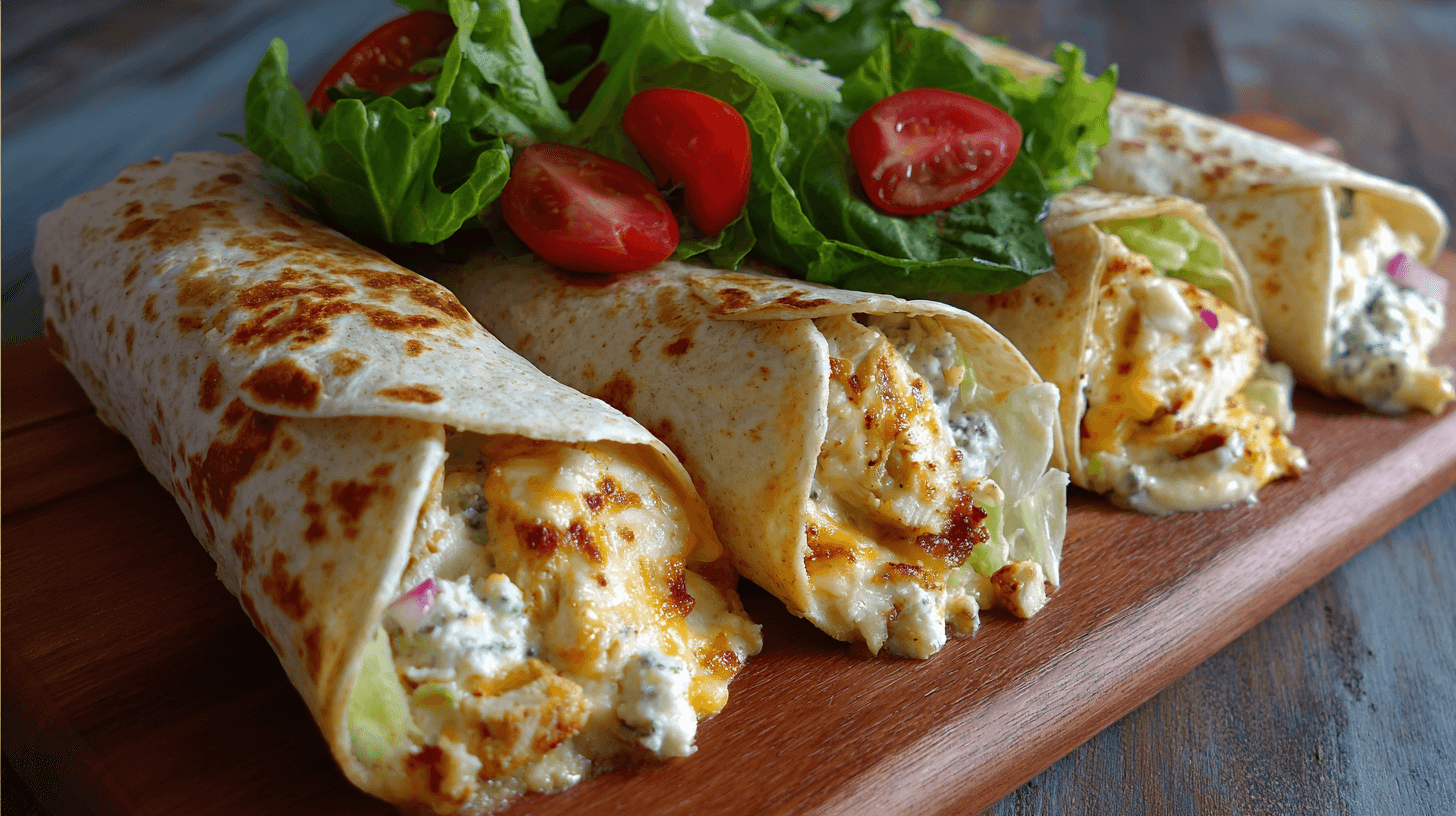
Slice each wrap in half on a diagonal—it looks more appealing and makes them easier to handle. Serve immediately while they’re still hot and crispy.
Nutritional Breakdown of Cheesy Garlic Chicken Wraps
Per wrap (makes 2 servings):
- Calories: 420-450
- Protein: 40-45g
- Carbohydrates: 25-30g
- Fat: 18-22g
- Fiber: 2-3g
These numbers make these wraps a balanced, high-protein meal that’s perfect for lunch or dinner. The protein content is particularly impressive, making them ideal for anyone focused on fitness, weight management, or simply eating more protein.
Creative Variations for Your Chicken Wraps
Buffalo Chicken Wraps
Replace the garlic chicken mixture with buffalo chicken: toss shredded chicken with buffalo sauce and blue cheese or ranch dressing. Add celery for crunch.
Mediterranean Garlic Chicken Wraps
Add sun-dried tomatoes, kalamata olives, feta cheese, and fresh spinach to your garlic chicken mixture. Use a hummus spread on the tortilla.
Mexican-Spiced Chicken Wraps
Season your chicken with taco seasoning instead of just garlic. Add pepper jack cheese, black beans, corn, and top with salsa and sour cream.
Caesar Chicken Wraps
Mix your chicken with Caesar dressing instead of mayo-yogurt mixture. Add romaine lettuce, parmesan cheese, and a sprinkle of croutons for crunch.
Perfect Pairings and Serving Suggestions
Side Dishes That Complement Chicken Wraps
- Simple green salad with lemon vinaigrette balances the richness
- Sweet potato fries or regular fries for classic comfort
- Coleslaw adds crunch and freshness
- Tomato soup makes it feel like an elevated grilled cheese
- Pickles or pickle chips for tangy contrast
Dipping Sauces
While these wraps are delicious on their own, sometimes a little extra sauce takes them over the top:
- Extra garlic aioli for garlic lovers
- Ranch dressing for cooling creaminess
- Hot sauce or sriracha mayo for heat
- Honey mustard for sweet-tangy flavor
- Marinara sauce for Italian vibes
Meal Prep and Storage Tips for Your Garlic Chicken Wraps
Make-Ahead Strategy
The filling: Make your garlic chicken filling up to 3 days in advance. Store it in an airtight container in the refrigerator. When you’re ready to eat, simply assemble and cook.
Assembled wraps: You can assemble the wraps (but don’t cook them) and store them wrapped tightly in plastic wrap in the fridge for up to 24 hours. Cook them when you’re ready to eat.
Cooked wraps: Fully cooked wraps can be stored in the refrigerator for up to 2 days.
Reheating for Best Results
Skillet method (best): Reheat in a non-stick skillet over medium heat for 2-3 minutes per side. This restores the crispiness.
Air fryer method (second best): Reheat at 375°F (190°C) for 5-6 minutes, flipping halfway through.
Microwave method (quickest but less crispy): Microwave for 1-2 minutes, but know that the tortilla won’t be as crispy.
Freezing Your Chicken Wraps
Yes, these freeze well! Wrap each cooked and cooled wrap tightly in plastic wrap, then place in a freezer bag. Freeze for up to 2 months. Thaw overnight in the refrigerator and reheat using the skillet or air fryer method.
Frequently Asked Questions About Cheesy Garlic Chicken Wraps
Can I use different types of tortillas? Absolutely! Whole wheat, spinach, tomato basil, low-carb, high-protein—they all work. Just make sure they’re large enough to wrap properly.
What if I don’t have Greek yogurt? You can use all mayo instead, or substitute sour cream. The yogurt adds protein and tanginess, but the wraps will still be delicious without it.
How do I prevent the wrap from getting soggy? Make sure your chicken mixture isn’t too wet. If it seems runny, add a bit more cheese to absorb moisture. Also, don’t assemble too far in advance—the longer the filling sits in the tortilla, the soggier it gets.
Can I make these vegetarian? Yes! Replace the chicken with roasted vegetables (bell peppers, zucchini, mushrooms), black beans, or chickpeas.
What’s the best cheese to use? Cheddar is classic, mozzarella is super melty, and a Mexican blend gives you the best of both worlds. I often use a combination.
My Expert Tips for Perfect Cheesy Garlic Chicken Wraps Every Time
After making these wraps hundreds of times, here are my top tips: Fresh garlic is best—pre-minced garlic from a jar works in a pinch, but fresh garlic gives you that punchy, bold flavor. Don’t overfill—it’s tempting to pack in more filling, but restraint leads to wraps that actually stay closed. Shred your own cheese—pre-shredded cheese contains anti-caking agents that prevent optimal melting. Room temperature chicken works best—cold chicken straight from the fridge won’t heat through properly. Taste and adjust—everyone’s garlic tolerance is different, so adjust the garlic to your preference.
Conclusion: Your New Go-To Chicken Wrap Recipe
These Cheesy Garlic Chicken Wraps have earned their place as one of my most-made recipes, and for good reason. They’re quick, satisfying, endlessly customizable, and packed with protein. Whether you’re meal-prepping for busy workdays, feeding hungry teenagers, or just craving something delicious for lunch, these wraps deliver every single time.
The combination of tender, garlicky chicken, melted cheese, and that perfectly crispy tortilla creates the kind of bite that makes you close your eyes and savor the moment. And knowing that you made something this delicious in under 20 minutes? That’s the cherry on top.
So next time you’re wondering what to make for lunch or a quick dinner, remember these Cheesy Garlic Chicken Wraps. They’re proof that simple ingredients, when combined thoughtfully, can create something truly special. Now go make a batch—your taste buds will thank you!