Last December, I was frantically searching for a quick holiday treat to bring to my office party when a colleague mentioned these incredibly simple Cool Whip candies. I was skeptical—how could something made with just four ingredients taste like actual homemade candy? But after making my first batch, I became an instant convert. These little chocolate-covered bites of creamy, fluffy goodness have since become my secret weapon for last-minute holiday gatherings, and everyone always assumes they took hours to make.
Why Cool Whip Candy Is a Holiday Game-Changer
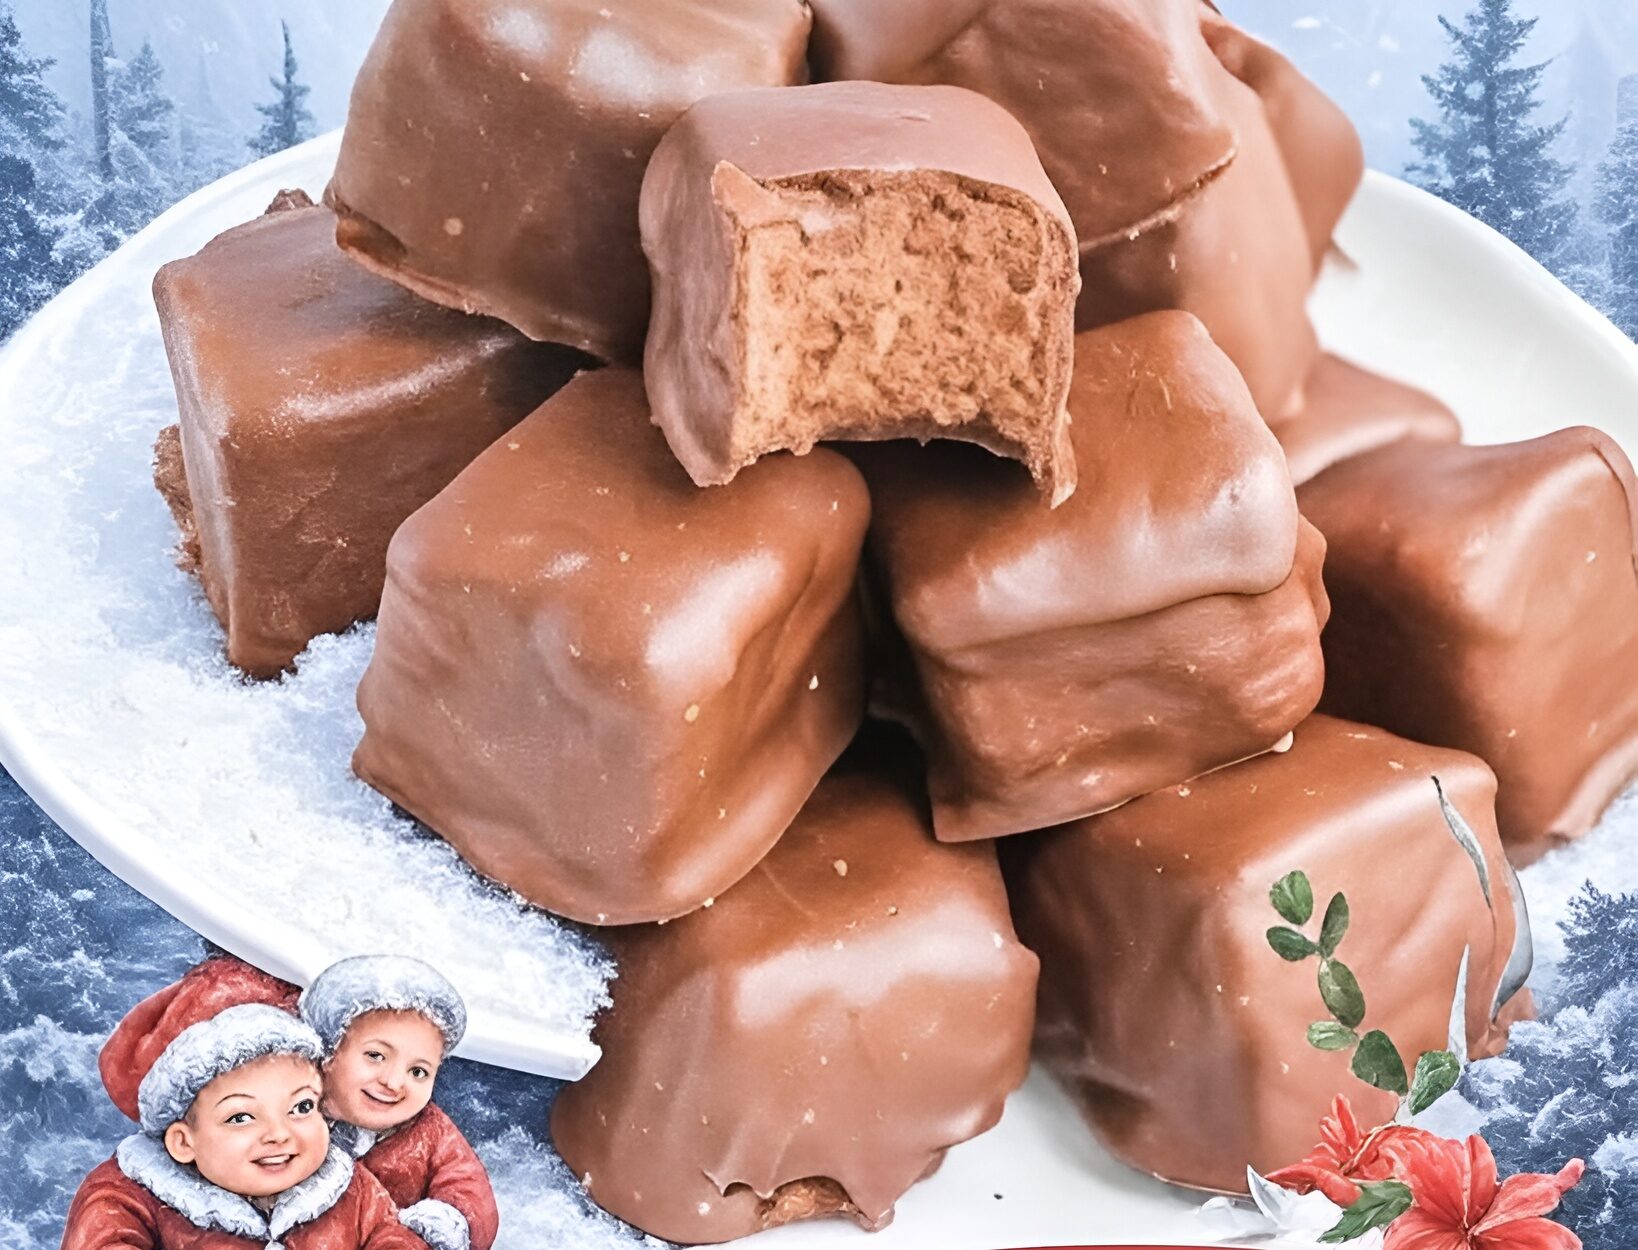
These chocolate Cool Whip candies represent the perfect intersection of simplicity and impressive results. With minimal ingredients and no complicated techniques, you can create candies that look professionally made and taste like they came from a fancy chocolate shop. The light, mousse-like interior contrasts beautifully with the crisp chocolate shell, creating a sophisticated texture that belies the recipe’s ease.
What makes this homemade candy recipe particularly appealing is its versatility. You can make these candies year-round by varying the chocolate type or adding different flavorings. But they’re especially perfect for holidays when you need to produce large quantities of gifts or treats without spending days in the kitchen.
Understanding the Magic of Whipped Topping Candy
The genius of Cool Whip candy lies in understanding how whipped topping behaves when frozen and coated. The frozen whipped topping creates a stable center that holds its shape during the chocolate dipping process. When you bite into the finished candy, the filling has a delightfully light, airy texture that melts in your mouth.
The addition of milk chocolate chips to the whipped topping intensifies the chocolate flavor throughout while the vegetable oil in the coating chocolate ensures it melts smoothly and sets with a glossy finish. Each component serves a specific purpose in creating candy-shop quality results.
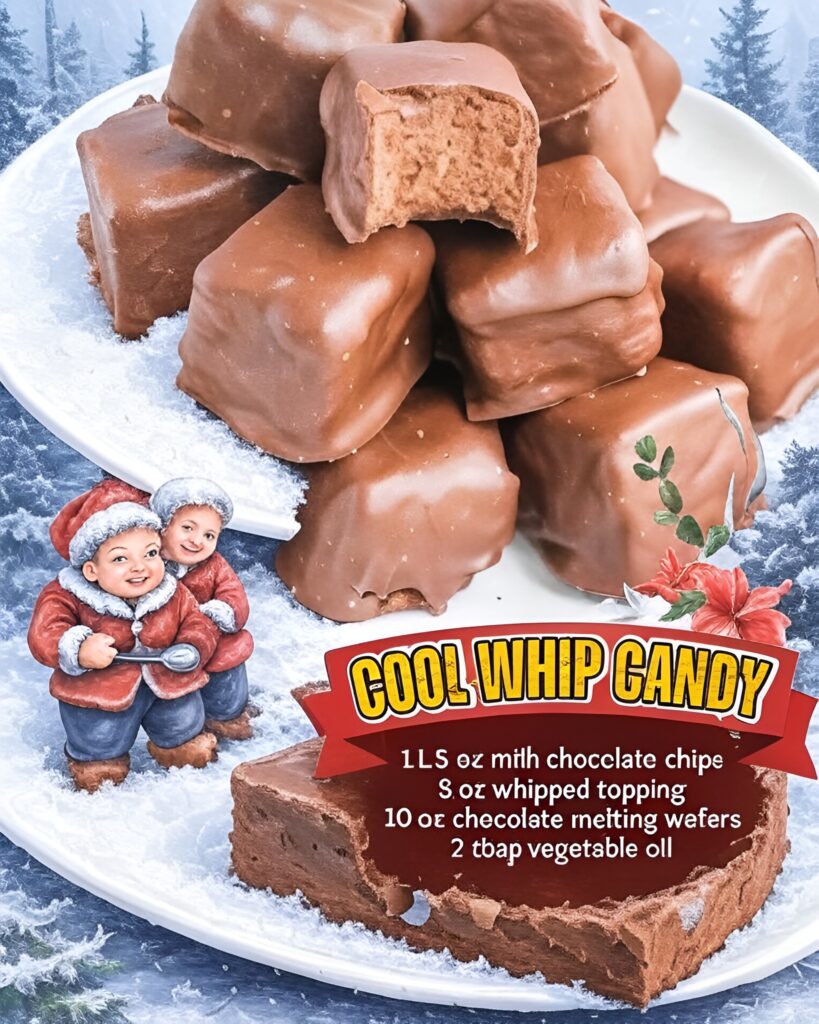
Essential Ingredients for Cool Whip Candy
Here’s what you’ll need to make these delightful candies:
- 11.5 oz milk chocolate chips
- 8 oz whipped topping (Cool Whip), thawed
- 10 oz chocolate melting wafers
- 2 tbsp vegetable oil
These four simple ingredients transform into elegant candies that taste far more complex than their components suggest. The quality of your chocolate makes a significant difference, so choose chocolate chips and melting wafers you’d enjoy eating on their own.
Step-by-Step Instructions for Making Cool Whip Candy
Preparing Your Workspace
Before you begin, line a baking sheet with parchment paper or a silicone baking mat. You’ll need space in your freezer for this sheet, so clear room ahead of time. Having everything organized makes the candy-making process smooth and enjoyable.
Measure out all your ingredients and have them ready. This recipe moves fairly quickly once you start mixing, and having everything measured prevents scrambling mid-process.
Creating the Candy Centers
In a medium bowl, gently fold the milk chocolate chips into the thawed whipped topping. The key word here is “gently”—you want to incorporate the chips without deflating the whipped topping too much. The airiness is what creates that light, fluffy texture in the finished candy.
Use a rubber spatula and a folding motion rather than stirring. Bring the spatula down through the center, across the bottom, and up the side, turning the bowl as you work. Continue until the chocolate chips are evenly distributed throughout.
Freezing the Centers
Using a cookie scoop or tablespoon, drop rounded portions of the mixture onto your prepared baking sheet. Space them about an inch apart—they won’t spread, but you’ll need room to work with them later.
Place the baking sheet in the freezer for at least 2 hours, or until the centers are completely frozen solid. They need to be thoroughly frozen to hold their shape when you dip them in melted chocolate. I often make these centers the night before I plan to coat them.
Preparing the Chocolate Coating
When your centers are frozen solid, prepare the chocolate coating. Combine the chocolate melting wafers and vegetable oil in a microwave-safe bowl. The vegetable oil thins the chocolate slightly, making it easier to coat the candies and creating a thinner shell.
Microwave in 30-second intervals at 50% power, stirring thoroughly after each interval. Continue until the chocolate is completely smooth with no lumps. Don’t rush this process by using full power—chocolate burns easily and becomes grainy if overheated.
Alternatively, you can melt the chocolate and oil in a double boiler over simmering water. This method gives you more control over the temperature and reduces the risk of burning.
Dipping the Frozen Centers
Remove a few frozen centers from the freezer at a time, leaving the rest frozen. Working quickly, drop one center into the melted chocolate. Use a fork to turn it, ensuring it’s completely coated on all sides.
Lift the candy with the fork, letting excess chocolate drip back into the bowl. Tap the fork gently on the edge of the bowl to remove more excess chocolate—this prevents thick, clumpy bases on your finished candies.
Slide the coated candy onto a parchment-lined sheet using a toothpick or another fork to push it off. The chocolate should begin setting almost immediately because the center is frozen.
Finishing and Storing
Continue dipping candies, working with just a few centers at a time to ensure they stay frozen. If your coating chocolate starts to thicken, reheat it briefly in the microwave for 10-15 seconds.
Once all candies are coated, refrigerate them for about 30 minutes to ensure the chocolate shell is completely set. After setting, you can leave them at room temperature for a few hours for serving, but store them in the refrigerator for longer keeping.
Nutritional Information
Per candy (makes approximately 20 candies):
- Calories: 135
- Total Fat: 8g
- Saturated Fat: 5g
- Cholesterol: 3mg
- Sodium: 15mg
- Total Carbohydrates: 15g
- Dietary Fiber: 1g
- Sugars: 13g
- Protein: 2g
Creative Variations for Holiday Candy
Dark Chocolate Cool Whip Candy
Use dark chocolate chips in the filling and dark chocolate melting wafers for coating. This creates a more sophisticated, less sweet candy perfect for adult palates. The deeper chocolate flavor is particularly elegant.
Peppermint Cool Whip Candy
Add ½ teaspoon of peppermint extract to the whipped topping before folding in the chocolate chips. Top each candy with crushed peppermint candies while the chocolate coating is still wet for a festive holiday appearance.
Raspberry Cool Whip Candy
Gently fold 2 tablespoons of seedless raspberry jam into the whipped topping along with the chocolate chips. The fruit flavor adds a sophisticated note and creates pretty pink swirls in the filling.
Cookies and Cream Candy
Add crushed Oreo cookies to the whipped topping mixture for a cookies and cream variation. The cookie pieces add textural interest and another flavor dimension to these simple candies.
Tips for Perfect Chocolate Candies Every Time
Keep those centers frozen solid. This is crucial—if they start to soften, return them to the freezer immediately. Soft centers will fall apart when you try to dip them and will make a mess.
Work in a cool kitchen if possible. If your kitchen is warm, your chocolate coating will take longer to set and may not develop that nice glossy finish. Turn on the air conditioning or work near an open window in cooler months.
Don’t skip the vegetable oil in the coating chocolate. It’s tempting to leave it out, but it makes a significant difference in how smoothly the chocolate coats and how thin and crisp the shell becomes.
Storage and Make-Ahead Options
Store Cool Whip candies in an airtight container in the refrigerator for up to 2 weeks. Layer them between sheets of parchment paper to prevent sticking. They’re fine at room temperature for a few hours but taste best when served slightly chilled.
These candies freeze beautifully for up to 3 months. Freeze them in a single layer first, then transfer to freezer bags or containers. This prevents them from sticking together and allows you to remove just what you need.
The uncoated centers can be frozen for up to 2 months, then coated fresh when needed. This makes them perfect for preparing way ahead of busy holiday seasons.
Serving Suggestions for Holiday Gatherings
Arrange these chocolate candies on a decorative platter or in small paper cups for an elegant presentation. Gold or silver foil cups look particularly festive for holidays and elevate the appearance to gift-shop quality.
For parties, set them out in small bowls throughout your gathering space. Their rich flavor means one or two satisfies, making them perfect for grazing.
Include them on holiday cookie trays alongside baked goods for textural variety. The creamy, cold center provides nice contrast to warm, crisp cookies.
Perfect Occasions for Cool Whip Candy
These easy candies are ideal for:
- Christmas cookie exchanges
- Valentine’s Day gifts
- Holiday office parties
- Teacher appreciation gifts
- Wedding or shower favors
- New Year’s Eve celebrations
- Any occasion requiring homemade treats
Gifting Ideas for Homemade Candy
Package Cool Whip candies in clear cellophane bags tied with festive ribbons for beautiful, inexpensive gifts. The chocolate coating protects them during transport, making them ideal for shipping.
Arrange them in small decorative boxes lined with tissue paper. Add a homemade label listing ingredients for recipients with allergies. The professional appearance makes these gifts feel special.
Create candy assortments by making several flavor variations and packaging them together. This variety pack approach is especially popular and allows recipients to sample different flavors.
Why This Recipe Is So Foolproof
The ingredient list is minimal and forgiving. Even if your proportions are slightly off, the candy will still taste delicious. There’s no temperature monitoring, no complicated candy-making techniques, and no special equipment required.
The frozen center trick makes dipping incredibly easy compared to traditional candy centers. You have plenty of working time since the frozen interior keeps everything stable and manageable even for beginners.
The recipe scales easily for large batches. Simply multiply all ingredients proportionally, and you can make enough for dozens of gift bags or large parties without significantly more effort.
The Science Behind These Candies
Whipped topping contains stabilizers that help it maintain structure when frozen. Unlike regular whipped cream which would separate and become icy, Cool Whip freezes into a stable, creamy texture perfect for candy centers.
The extreme cold of the frozen center causes the melted chocolate coating to set almost instantly upon contact. This rapid setting prevents thick, uneven coats and creates that professional thin shell.
The fat content in both the whipped topping and chocolate creates a smooth, creamy mouthfeel that makes these candies taste indulgent despite their simple preparation.
Troubleshooting Common Candy Issues
If your centers are falling apart when dipping, they’re not frozen solidly enough. Return them to the freezer for another hour and make sure your freezer is set to the coldest setting.
If the chocolate coating is too thick, add another teaspoon of vegetable oil and stir well. The chocolate should flow smoothly off your dipping fork with just gentle tapping.
If candies develop condensation after removing from refrigerator, let them sit at room temperature for 15 minutes before serving. The condensation will evaporate, restoring the glossy appearance.
My Personal Cooking Tip
Here’s my secret for the most professional-looking Cool Whip candies: before freezing the centers, use a small cookie scoop to ensure they’re all exactly the same size—this creates uniform candies that look store-bought. After scooping them onto the parchment, I gently roll each one between my palms to create perfectly round balls rather than leaving them in rough dome shapes. When it’s time to dip, I keep a bowl of very cold water nearby with a few ice cubes in it. Between batches of dipping, I dip my dipping fork in this cold water and dry it quickly—this keeps the fork cold and prevents chocolate from building up on it, which can leave marks on your candies. Finally, here’s a presentation trick that makes a huge difference: immediately after coating each candy and placing it on the parchment, while the chocolate is still wet, use a toothpick to swirl the top in a decorative pattern. This hides any imperfections from the dipping fork and creates a professional chocolate shop look. With these small extra steps, your $10 batch of candy will look like it cost $30 at a boutique!