Every autumn, when the air turns crisp and leaves begin their colorful transformation, I find myself craving the warm, comforting flavors of pumpkin spice. This pumpkin delight layered dessert has become my signature fall contribution to family gatherings—a stunning four-layer creation that looks like it requires professional pastry skills but actually comes together with remarkable ease. The first time I made it, my mother-in-law asked for the recipe before she’d even finished her slice, and it’s been requested at every Thanksgiving since.
Why This Layered Pumpkin Dessert Is Fall Perfection
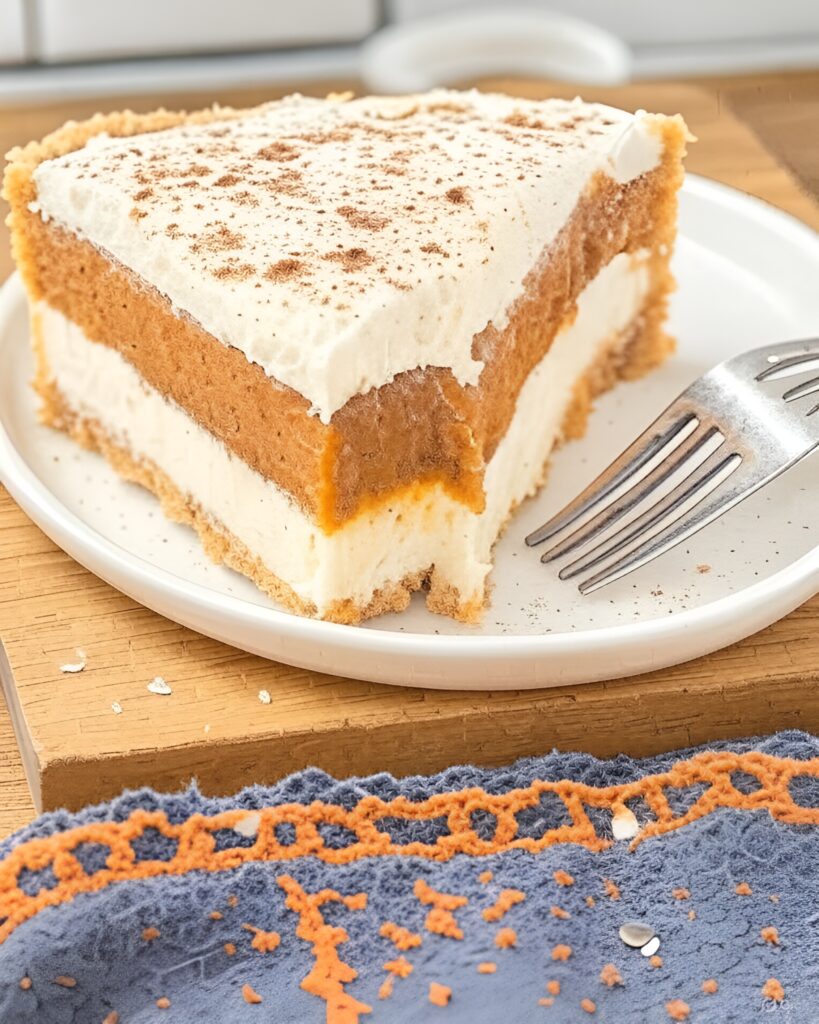
This pumpkin layered dessert captures everything we love about autumn in one beautiful dish. Each layer contributes something unique: the graham cracker crust provides crunch and buttery flavor, the cream cheese layer adds tangy richness, the spiced pumpkin layer delivers that essential fall taste, and the whipped cream topping creates a light, airy finish. Together, they create a dessert that’s greater than the sum of its parts.
What makes this no-bake pumpkin dessert particularly special is how the layers remain distinct when you cut into it. Unlike some layered desserts where everything mushes together, this one maintains beautiful definition, creating an Instagram-worthy slice every time you serve it.
Understanding the Architecture of Layered Desserts
The success of this pumpkin dessert recipe lies in understanding how each layer supports and complements the others. The firm crust provides structure, the cream cheese layer acts as a moisture barrier protecting the crust from becoming soggy, the pumpkin layer adds flavor and color, and the whipped topping provides visual appeal and textural contrast.
Temperature and chilling time are crucial to achieving those perfect layers. Each layer needs adequate time to set before adding the next, ensuring they don’t blend together. Patience truly is a virtue when creating this fall dessert masterpiece.
Essential Ingredients for Pumpkin Delight
Here’s what you’ll need to create this impressive dessert:
For the Crust:
- 2 cups graham cracker crumbs (about 16 crackers)
- ½ cup butter, melted
- ¼ cup granulated sugar
For the Cream Cheese Layer:
- 8 oz cream cheese, softened
- 1 cup powdered sugar
- 1 cup Cool Whip, divided
For the Pumpkin Layer:
- 15 oz can pure pumpkin puree
- 3.4 oz package instant vanilla pudding mix
- 1 tsp pumpkin pie spice
- ½ tsp cinnamon
- 1 cup milk
For the Topping:
- Remaining Cool Whip (approximately 2 cups)
- Optional: ground cinnamon for dusting
- Optional: chopped pecans for garnish
These ingredients create a 9×13-inch pan of dessert that serves 12-15 people generously. The specific measurements ensure proper texture and flavor balance in each layer.
Step-by-Step Instructions for Making Pumpkin Delight
Creating the Graham Cracker Crust
Begin by crushing graham crackers into fine crumbs. You can do this in a food processor, or place crackers in a sealed plastic bag and crush with a rolling pin. Measure out 2 cups of crumbs and place them in a medium bowl.
Add the melted butter and granulated sugar to the graham cracker crumbs. Stir with a fork until all the crumbs are evenly moistened. The mixture should resemble wet sand and hold together when pressed.
Press this mixture firmly and evenly into the bottom of a 9×13-inch baking dish. Use the bottom of a measuring cup or glass to really compact the crust, paying special attention to the corners and edges. A well-compacted crust won’t be crumbly when you cut the dessert later.
Refrigerate the crust for at least 15 minutes while you prepare the next layer. This initial chilling helps it firm up and makes spreading the cream cheese layer easier.
Preparing the Cream Cheese Layer
In a large bowl, beat the softened cream cheese with an electric mixer until it’s light and fluffy, about 2-3 minutes. This initial beating removes lumps and creates a smooth base for your layer.
Add the powdered sugar and beat until fully incorporated and smooth. The mixture should be pale and creamy with no visible sugar granules.
Gently fold in 1 cup of Cool Whip using a rubber spatula. Use a folding motion rather than stirring to maintain the airiness of the whipped topping. Continue folding until the mixture is uniform in color with no white streaks.
Carefully spread this cream cheese mixture over the chilled graham cracker crust. Use an offset spatula to create an even layer that reaches all the edges and corners. Smooth the top as much as possible—this creates a nice foundation for the pumpkin layer.
Refrigerate for 20-30 minutes to allow this layer to set before adding the pumpkin mixture.
Making the Pumpkin Layer
In a large bowl, combine the pumpkin puree, instant vanilla pudding mix, pumpkin pie spice, and cinnamon. Add the milk and whisk vigorously for about 2 minutes, until the mixture is smooth and slightly thickened.
The pudding mix is crucial here—it helps the pumpkin layer set properly and adds sweetness and vanilla flavor that complements the pumpkin beautifully. Don’t skip it or substitute with anything else.
Let this mixture sit for about 5 minutes to thicken further. It should be spreadable but not runny. If it seems too thin, let it sit a few more minutes; the pudding mix continues to thicken as it rests.
Carefully spread the pumpkin mixture over the cream cheese layer. Work from the center outward, using gentle pressure to avoid disturbing the layer beneath. Create an even layer that reaches all edges.
Refrigerate for at least 1 hour, or until the pumpkin layer is set and no longer jiggly when you gently shake the pan.
Adding the Final Whipped Topping Layer
Once the pumpkin layer is completely set, spread the remaining Cool Whip evenly over the top. You can create decorative swirls and peaks with the back of a spoon, or smooth it completely flat for a more modern presentation.
For an elegant finishing touch, lightly dust the top with ground cinnamon using a fine-mesh sieve. This adds color, hints at the flavors within, and creates a professional bakery appearance.
Sprinkle chopped pecans around the edges or create a decorative pattern on top. The nuts add crunch and visual interest while complementing the autumn flavor profile.
Final Chilling and Serving
Cover the dessert carefully with plastic wrap, making sure it doesn’t touch the whipped topping surface. Insert toothpicks around the edges if needed to tent the plastic wrap.
Refrigerate for at least 4 hours, though overnight is ideal. This extended chilling time allows all the layers to set properly and the flavors to meld together beautifully. The dessert slices cleanest after this full chilling period.
When ready to serve, dip a large, sharp knife in hot water, wipe it dry, and cut clean slices. Repeat this process between each cut for the neatest presentation.
Nutritional Information
Per serving (based on 15 servings):
- Calories: 285
- Total Fat: 14g
- Saturated Fat: 8g
- Cholesterol: 35mg
- Sodium: 240mg
- Total Carbohydrates: 36g
- Dietary Fiber: 2g
- Sugars: 26g
- Protein: 3g
Creative Variations for Pumpkin Layered Dessert
Maple Pecan Pumpkin Delight
Replace ½ cup of the milk in the pumpkin layer with pure maple syrup for deeper fall flavor. Add ½ cup of toasted chopped pecans to the graham cracker crust for extra crunch and nuttiness.
Gingersnap Pumpkin Delight
Replace the graham cracker crust with crushed gingersnap cookies. The spicy ginger flavor intensifies the autumn taste and pairs beautifully with the pumpkin layer.
Chocolate Pumpkin Delight
Add ½ cup of mini chocolate chips to the cream cheese layer. Drizzle melted chocolate over the final whipped topping for a chocolate-pumpkin combination that’s surprisingly delicious.
Individual Pumpkin Parfaits
Layer all the components in clear glasses or mason jars for individual servings. This presentation is perfect for parties and allows guests to see all the beautiful layers.
Tips for Perfect Layered Pumpkin Dessert
Use pure pumpkin puree, not pumpkin pie filling. Pumpkin pie filling already contains spices and sweeteners that will throw off the balance of flavors in this recipe. Check the label carefully—you want 100% pure pumpkin.
Don’t rush the chilling times between layers. Each layer needs adequate time to set before you add the next, or they’ll blend together and lose that beautiful definition that makes this dessert so impressive.
For the cleanest slices, cut with a hot, clean knife. Keep a pitcher of hot water nearby and dip your knife before each cut, wiping it clean between slices. This prevents dragging layers and creates professional-looking servings.
Storage and Make-Ahead Options
This pumpkin delight dessert actually improves with time, making it an excellent make-ahead option. Prepare it up to 2 days before your event and keep it covered in the refrigerator. The flavors meld together beautifully as it sits.
Store leftovers covered in the refrigerator for up to 4 days. The crust will soften slightly over time as it absorbs moisture from the filling layers, but the dessert remains delicious.
I don’t recommend freezing this particular dessert. The Cool Whip topping and cream cheese layer can separate when thawed, affecting the texture and appearance.
Serving Suggestions for Fall Gatherings
Serve slices of this pumpkin layered dessert on white plates to make the orange pumpkin layer pop visually. Add a small dollop of additional whipped cream and a whole cinnamon stick for an elegant garnish.
For buffet service, cut the dessert into squares in the pan and provide a pie server for guests to help themselves. Place it near the end of the buffet line after main dishes so it stays properly chilled.
Pair each serving with hot apple cider, spiced chai tea, or coffee. The warm beverages complement the cool, creamy dessert perfectly and enhance the autumn flavor profile.
Perfect Occasions for Pumpkin Dessert
Pumpkin delight is ideal for:
- Thanksgiving dinner
- Friendsgiving celebrations
- Fall potlucks
- Harvest parties
- Halloween gatherings
- Autumn birthday celebrations
- Any event from September through November
Presentation Ideas for Maximum Impact
For a stunning presentation, reserve some extra graham cracker crumbs and press them around the edges of the dessert before adding the final whipped topping layer. This creates a decorative border that hints at the crust within.
Create a pumpkin patch scene on top by piping small whipped cream pumpkins using orange-tinted Cool Whip and a piping bag. Add chocolate chip stems for an adorable fall decoration.
For elegant entertaining, cut the dessert into rectangles rather than squares, and stand each piece on its side on the serving plate so diners can see all the gorgeous layers from a profile view.
Why This Recipe Works for Busy Cooks
The no-bake aspect makes this pumpkin dessert perfect for busy holiday schedules when your oven is dedicated to turkey, stuffing, and casseroles. You can prepare it completely without competing for oven space.
The ingredients are straightforward and readily available at any grocery store, especially during fall when pumpkin products are prominently featured. No specialty shops or unusual items required.
It feeds a crowd economically. One 9×13 pan serves 12-15 people generously, making it cost-effective for large gatherings. You can even make two pans for extra-large celebrations without significant additional effort.
The Science Behind Successful Layers
The cream cheese layer acts as a crucial moisture barrier between the wet pumpkin filling and the crust. Without this protective layer, the crust would become soggy as moisture migrates from the pumpkin layer.
Instant pudding mix in the pumpkin layer provides structure and helps it set without baking. The starches in the pudding mix absorb liquid and create a firm, sliceable texture that holds together beautifully.
Proper chilling allows the fats in each layer to solidify, creating stable, distinct layers that maintain their separation when cut. Room temperature or warm desserts would slump and lose definition.
Troubleshooting Common Layered Dessert Issues
If your layers are blending together, you didn’t allow adequate chilling time between layers. Next time, be more patient and ensure each layer is completely set before adding the next.
If the dessert is too soft to slice cleanly, it needs more total chilling time. Return it to the refrigerator for another 2-3 hours, and make sure your refrigerator is cold enough (below 40°F).
If the crust is crumbly and won’t hold together, you didn’t add enough butter or didn’t press it firmly enough. The mixture should be well-moistened and very compacted.
Making This Dessert Ahead for Holidays
For Thanksgiving, I recommend making this pumpkin delight on Tuesday evening. This gives it ample time to set and chill completely, and one less thing to worry about on the busy holiday itself.
The dessert can be made Wednesday for Thursday service, but I find Tuesday prep provides the perfect chilling time and reduces pre-holiday stress. Plus, the flavors truly are better after 24-48 hours in the refrigerator.
Have your serving utensils and plates ready before the meal so you can serve dessert quickly when the time comes. This prevents the dessert from sitting at room temperature too long, which could soften it.
My Personal Cooking Tip
Here’s my secret for the most beautiful pumpkin delight: before adding each layer, run a small offset spatula under hot water, dry it quickly, and use it to spread. The slight warmth helps the mixtures spread more smoothly without the spatula dragging or tearing the layer beneath. When making the cream cheese layer, I actually beat the cream cheese for a full 3-4 minutes—longer than you think necessary—because this creates an incredibly smooth, fluffy texture that’s absolutely worth the extra time. For the pumpkin layer, after mixing everything together, I actually pass it through a fine-mesh sieve. This might seem fussy, but it removes any lumps and creates an absolutely silky-smooth layer that looks professionally made. Finally, here’s a presentation trick: before refrigerating the finished dessert, use a toothpick to sketch a decorative pattern in the whipped topping—swirls, leaves, or geometric designs. These indentations remain visible after chilling and create a beautiful, intentional design that elevates the entire presentation. With these extra touches, your homemade dessert will look like something from an upscale bakery!