Tiger Butter Fudge Recipe: The Ultimate 3-Ingredient Holiday Treat
Last Christmas, I needed a last-minute gift for my neighbors. Panicking slightly, I remembered seeing a recipe for something called “tiger butter fudge” that promised to be quick, easy, and impressive. With just thirty minutes before I needed to leave, I threw together three simple ingredients and created what has since become my most-requested holiday treat. The gorgeous marbled pattern looked like it took hours of skill, but my secret? It was almost embarrassingly easy.
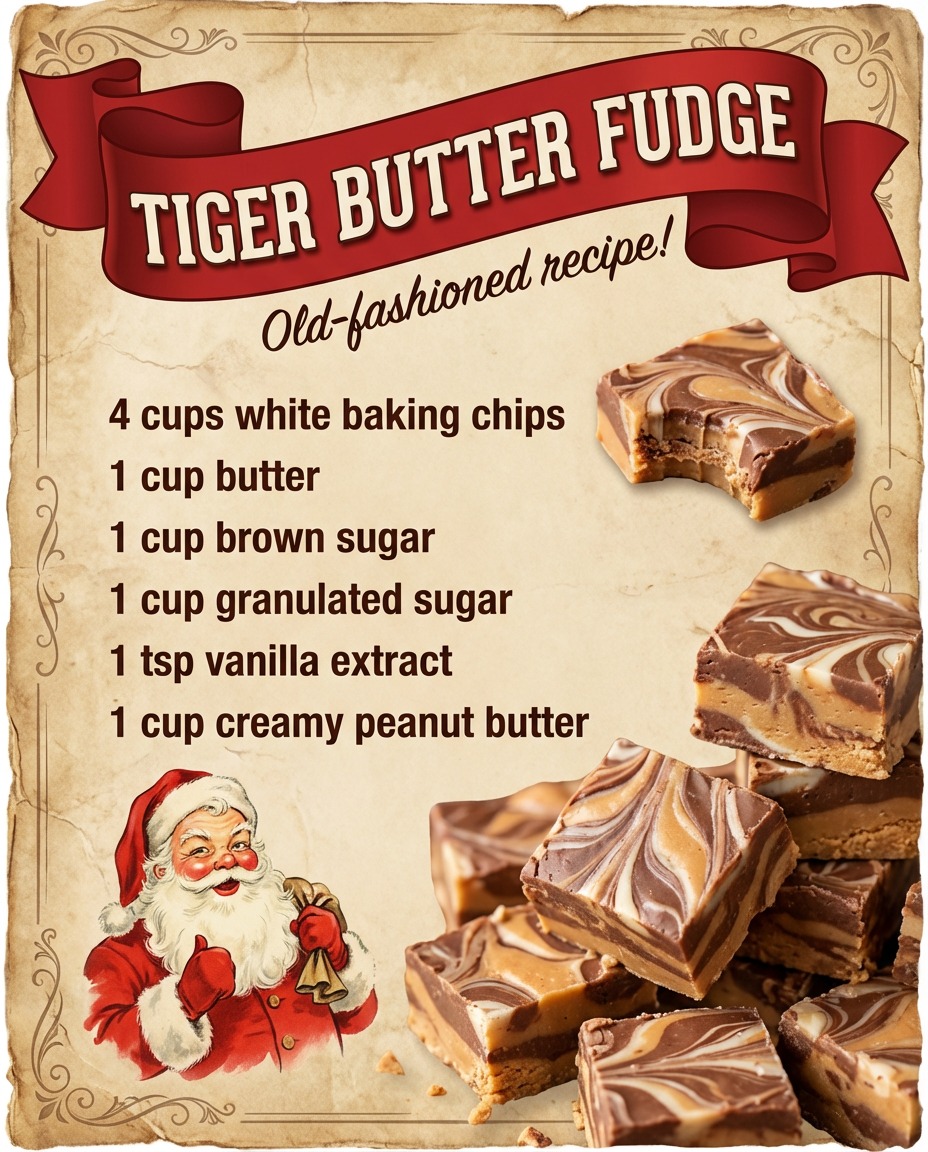
Tiger butter fudge is the holy grail of easy holiday candy recipes. This stunning confection combines creamy peanut butter, rich chocolate, and smooth white chocolate in a beautiful swirled pattern that resembles tiger stripes – hence the name. The best part? You only need three ingredients, no candy thermometer, and about fifteen minutes from start to finish. If you’re looking for an impressive gift, a show-stopping dessert, or just an excuse to indulge in chocolate and peanut butter, this tiger butter fudge recipe is about to become your new favorite.
What is Tiger Butter Fudge?
Tiger butter fudge is a no-bake confection that falls somewhere between traditional fudge and chocolate bark. Unlike classic fudge recipes that require precise temperature control and can be finicky to make, this tiger butter recipe uses melted chocolate chips and peanut butter to create a rich, creamy treat that sets up perfectly every time.
The name comes from the distinctive marbled appearance created when dark chocolate is swirled through a peanut butter and white chocolate base. The resulting stripes look remarkably like a tiger’s coat, making this not just delicious but also visually stunning. This chocolate peanut butter fudge has been a beloved treat since the 1980s and is experiencing a major renaissance thanks to social media.
Why This Tiger Butter Recipe Will Become Your Go-To
Foolproof Three-Ingredient Simplicity
This easy fudge recipe requires just three basic ingredients that you can find at any grocery store: white chocolate chips, peanut butter, and semi-sweet chocolate chips. That’s it! No sweetened condensed milk, no corn syrup, no complicated steps. If you can melt chocolate and swirl with a knife, you can make this peanut butter fudge.
No Candy Thermometer Required
Traditional fudge recipes demand precise temperature control, with the mixture heated to exactly the right degree on a candy thermometer. Mess up the temperature by even a few degrees, and your fudge can turn out grainy or refuse to set. This tiger butter fudge recipe eliminates all that stress. No thermometer, no guesswork, no worry.
Makes an Impressive Gift
The beautiful tiger stripes make this chocolate fudge look like it came from an expensive candy shop. Package it in clear bags tied with ribbon, arrange it on a festive plate, or box it up in pretty tins. Recipients will be amazed when you tell them it took you less than twenty minutes to make.
Perfect for Holiday Cookie Exchanges
When everyone else brings cookies to your holiday exchange, stand out with this tiger butter candy. It’s different, it’s beautiful, and it’s absolutely delicious. Plus, fudge cuts cleanly into perfect squares that are easy to serve and share.
Crowd-Pleasing Flavor
The combination of chocolate and peanut butter is universally beloved. Even picky eaters tend to love this tiger fudge, making it perfect for family gatherings where you need to please a variety of palates.
Ingredients for Tiger Butter Fudge
For the Peanut Butter Base:
- 4 cups white chocolate chips (or white baking chips)
- 1 cup creamy peanut butter
- 1 teaspoon vanilla extract (optional but recommended)
For the Tiger Stripes:
- 1 cup semi-sweet chocolate chips
- 1 tablespoon butter (optional, for smoother chocolate)
Optional Enhancements:
- Pinch of salt (enhances all the flavors)
- 1 tablespoon heavy cream (for chocolate, creates ganache consistency)
The quality of your ingredients matters more than you might think. Since this recipe has so few components, each one shines through. Use good-quality chocolate chips – I recommend brands like Ghirardelli or Guittard. For peanut butter, stick with traditional creamy varieties like Jif or Skippy. Natural peanut butters with separated oil don’t work as well in this tiger butter fudge recipe.
Step-by-Step Instructions: How to Make Tiger Butter Fudge
Step 1: Prepare Your Pan
Line an 8×8-inch or 9×9-inch square baking pan with parchment paper or aluminum foil, leaving some overhang on the sides. This overhang acts as handles, making it super easy to lift the finished fudge out of the pan for cutting. Lightly spray or butter the paper to prevent any sticking. Having your pan ready before you start melting chocolate is crucial – you want to work quickly once everything is melted.
Step 2: Melt the White Chocolate and Peanut Butter
Place your white chocolate chips in a large microwave-safe bowl. Microwave on 50% power for one minute, then stir. Continue microwaving in 30-second intervals at 50% power, stirring thoroughly after each interval, until the chocolate is almost completely melted. Remove from the microwave and stir vigorously – the residual heat will melt any remaining small chunks.
Now add your peanut butter to the melted white chocolate. Stir until completely combined and smooth. The peanut butter will melt into the warm chocolate easily. If you’re adding vanilla extract, stir it in now. The mixture should be silky smooth, glossy, and pourable. This is your peanut butter fudge base.
Pro tip: If you prefer, you can use a double boiler instead of the microwave. Place a heatproof bowl over a pot of barely simmering water and melt the white chocolate, stirring frequently. This method provides more control and reduces the risk of seizing or burning your chocolate.
Step 3: Pour and Spread the Base
Immediately pour your peanut butter and white chocolate mixture into your prepared pan. Use a spatula to spread it evenly to the edges. Don’t worry about it being perfectly smooth – you’ll be swirling chocolate through it soon. The mixture should be about 1/2 to 3/4 inch thick. Let it sit for just a minute while you melt your chocolate.
Step 4: Melt the Semi-Sweet Chocolate
In a separate microwave-safe bowl, place your semi-sweet chocolate chips. Using the same method as before, microwave at 50% power for one minute, stir, then continue in 30-second intervals until melted and smooth. If you’re adding butter or heavy cream to your chocolate, stir it in now. This creates a more fluid chocolate that swirls more easily and stays softer.
Step 5: Create the Tiger Stripes
Here’s where the magic happens! Using a spoon, drizzle or dollop the melted chocolate over the peanut butter layer in lines or random patterns. Work relatively quickly before the chocolate begins to set. You can create thick stripes, thin lines, or random blobs – it will all look beautiful once swirled.
Now for the fun part: Take a butter knife, skewer, or toothpick and drag it through the chocolate and peanut butter mixture to create swirls. Pull your tool through lengthwise, then widthwise, making figure-eight patterns or random swirls. Don’t over-swirl or you’ll mix the two layers together too much and lose the stripe effect. Three to five swoops through the pan in each direction usually creates perfect tiger stripes.
Step 6: Chill and Set
Place your pan in the refrigerator for at least 2-3 hours, or until the fudge is completely firm. For best results, chill overnight. The cold temperature is necessary for this tiger butter candy to set properly and achieve that perfect fudge-like texture.
Step 7: Cut and Serve
Once fully chilled and set, use the parchment paper overhang to lift the entire block of fudge out of the pan. Place it on a cutting board. Using a sharp knife (wipe it clean between cuts for the neatest edges), cut the fudge into 1-inch squares. You should get about 64 pieces from an 8×8 pan.
For the cleanest cuts, let the fudge sit at room temperature for about 10-15 minutes before cutting. This takes the extreme chill off so the knife glides through more smoothly. Some people like to dip their knife in hot water and wipe it dry between cuts for extra-neat edges.
Pro Tips for Perfect Tiger Butter Fudge
Temperature Control for Chocolate
The biggest mistake when making chocolate fudge is overheating the chocolate. Always use 50% power on your microwave and work in short intervals. Overheated chocolate can seize, becoming grainy and unworkable. If your chocolate starts to look dry or lumpy, you’ve overheated it.
Choose the Right Peanut Butter
Use regular, processed peanut butter like Jif, Skippy, or Peter Pan. Natural peanut butters with the oil separated on top don’t incorporate as smoothly and can affect the texture of your tiger butter fudge. Make sure your peanut butter is at room temperature for easiest mixing.
Swirling Technique
Less is more when it comes to swirling! Over-swirling will cause your colors to muddy together, losing that beautiful tiger stripe effect. Aim for about 5-8 swirls total – a few lengthwise and a few crosswise. Each swirl should be deliberate and confident.
Pan Size Matters
An 8×8 or 9×9 inch pan creates fudge with ideal thickness. Too large a pan and your fudge will be thin and fragile. Too small and it will be overly thick and difficult to cut. If you want to double the recipe, use a 9×13 inch pan.
Patience During Setting
Don’t try to cut this peanut butter chocolate fudge too soon! It needs at least 2-3 hours to firm up properly. Cutting too early results in messy, gooey squares that won’t hold their shape. If you’re in a hurry, place the pan in the freezer for 1-2 hours instead.
Variations of Tiger Butter Fudge Recipe
Dark Chocolate Tiger Butter
Replace the semi-sweet chocolate with dark chocolate chips for a more sophisticated flavor. The bitterness of dark chocolate perfectly balances the sweetness of the white chocolate and creates a more adult version of this treat.
Milk Chocolate Version
Prefer milder chocolate? Use milk chocolate chips instead of semi-sweet. This creates a sweeter, creamier tiger fudge that kids especially love.
Crunchy Tiger Butter Fudge
Stir 1/2 cup of chopped peanuts, crushed pretzels, or Rice Krispies into your peanut butter base before spreading it in the pan. The added crunch provides wonderful textural contrast.
Salted Caramel Tiger Butter
Drizzle salted caramel sauce over the peanut butter layer before adding the chocolate. Swirl everything together for a salted caramel peanut butter fudge that’s absolutely divine.
Holiday-Themed Variations
For Christmas, use red and green colored melting chocolate instead of brown. For Valentine’s Day, add a few drops of red food coloring to your white chocolate and use pink and white stripes. The swirling technique works with any color combination!
Nutella Tiger Butter
Replace half of the peanut butter with Nutella for a chocolate-hazelnut version. This creates an even richer chocolate flavor throughout.
Almond Butter Alternative
For those with peanut allergies, substitute almond butter for peanut butter. The flavor is slightly different but equally delicious. Cashew butter also works beautifully in this tiger butter recipe.
Storage Tips for Tiger Butter Fudge
Room Temperature Storage
Store your tiger butter fudge in an airtight container at room temperature for up to one week. Layer the pieces between sheets of parchment or wax paper to prevent them from sticking together. Keep the container in a cool, dry place away from direct sunlight or heat sources.
Refrigerator Storage
For longer storage, keep your chocolate peanut butter fudge in the refrigerator. It will last 2-3 weeks when properly stored. Let it sit at room temperature for 10-15 minutes before serving for the best texture and flavor.
Freezing Tiger Butter Fudge
This fudge freezes beautifully! Wrap pieces individually in plastic wrap, then store in a freezer-safe container or bag for up to 3 months. Thaw in the refrigerator overnight before serving. Freezing makes this perfect for making ahead for the holidays.
Preventing Moisture
The enemy of all chocolate treats is moisture. Always make sure your storage container is completely dry, and never store fudge in a humid environment. In very humid climates, refrigerator storage is best.
Gifting Your Tiger Butter Candy
Packaging Ideas
Present your tiger butter fudge in clear cellophane bags tied with ribbon for a simple but elegant gift. Arrange pieces in small decorative tins or boxes lined with tissue paper. For a rustic look, package in mason jars or wrap in brown paper tied with twine and a gift tag.
Holiday Gift Baskets
Include tiger butter fudge in holiday gift baskets alongside other homemade treats, gourmet coffee, or a bottle of wine. It pairs beautifully with other gifts and adds a homemade touch that’s always appreciated.
Cookie Exchange Champion
Bring this tiger fudge to cookie exchanges for something different. Cut it into smaller bite-sized pieces and arrange on a festive platter. People love the variety, and you’ll definitely get requests for the recipe!
Corporate Gifts
This easy fudge recipe makes professional-looking corporate gifts. Package in elegant boxes and add custom labels. The impressive appearance and delicious taste make clients and colleagues feel valued.
Nutritional Information for Tiger Butter Fudge
Per piece (approximately 1-inch square):
- Calories: 115-130
- Total Fat: 7-8g
- Saturated Fat: 4g
- Cholesterol: 2-5mg
- Sodium: 35-50mg
- Total Carbohydrates: 12-14g
- Sugars: 11-13g
- Protein: 2g
While this tiger butter fudge is definitely a treat rather than a health food, the peanut butter does provide some protein and healthy fats. As with all sweets, portion control is key. One or two small pieces satisfy a sweet craving without overdoing it.
Frequently Asked Questions About Tiger Butter Fudge
Why is my fudge grainy?
Grainy texture usually comes from overheating the chocolate or from moisture getting into your mixture. Always melt chocolate slowly at reduced power and ensure all your utensils are completely dry. Using high-quality chocolate chips also helps prevent graininess.
Can I use chocolate bars instead of chips?
Yes! Chop chocolate bars into small, uniform pieces before melting. However, chocolate chips contain stabilizers that help them maintain shape during baking, which also makes them slightly easier to melt smoothly.
Why won’t my fudge set?
If your fudge remains soft even after several hours in the refrigerator, you may have used too much peanut butter or the chocolate wasn’t fully melted. Try freezing it for an hour – sometimes that helps. For next time, make sure to measure ingredients accurately.
Is tiger butter really fudge or candy?
Technically, tiger butter falls somewhere between fudge and chocolate bark. Traditional fudge is made with sugar, butter, and milk, cooked to a specific temperature. This tiger butter recipe is simpler but achieves a similar texture and richness, which is why it’s often called fudge.
Can I make this without peanut butter?
Yes! Substitute sunflower seed butter, almond butter, or even cookie butter (Biscoff spread) for peanut butter. Each alternative creates a different but delicious flavor profile.
How do I fix seized chocolate?
If your chocolate seizes and becomes grainy, try adding a tablespoon of vegetable oil or shortening and stirring vigorously. This sometimes smooths it out. Prevention is better though – always keep water away from melting chocolate!
Pairing Suggestions for Tiger Butter Fudge
Beverage Pairings
This rich chocolate peanut butter fudge pairs wonderfully with:
- Hot coffee (especially dark roasts)
- Cold milk
- Red wine (try a fruity Pinot Noir)
- Port or dessert wine
- Hot cocoa with marshmallows
- Espresso or cappuccino
Dessert Board Additions
Create an impressive dessert board featuring:
- Tiger butter fudge squares
- Fresh strawberries
- Assorted cookies
- Chocolate truffles
- Salted caramels
- Candied nuts
The fudge’s richness pairs beautifully with fresh fruit, which provides a refreshing contrast.
The History of Tiger Butter
Tiger butter fudge emerged in the 1980s during the boom of quick, easy candy recipes. As microwaves became standard in American kitchens, recipes that utilized this technology gained popularity. The visual appeal of the marbled pattern combined with the universally loved peanut butter and chocolate flavors made tiger butter an instant hit at bake sales, potlucks, and holiday gatherings.
The recipe was popularized by Betty Crocker and various Southern cooking magazines. It became particularly beloved in the South, where peanuts are a staple crop and peanut butter features prominently in regional cuisine. The name “tiger butter” appears to have been coined because the swirled pattern resembles tiger stripes, though some also call it “zebra fudge” or simply “swirled peanut butter fudge.”
Making Tiger Butter Fudge with Children
This is an excellent recipe to make with kids! The simple steps and impressive results make it perfect for teaching basic cooking skills:
Age-Appropriate Tasks:
- Ages 4-6: Stirring the mixture, helping create swirls with supervision
- Ages 7-10: Measuring ingredients, microwaving with supervision, swirling patterns
- Ages 11+: Complete recipe with minimal supervision
Children love watching the chocolate swirl and creating their own unique patterns. It’s also a great lesson in patience as they wait for the fudge to set!
Troubleshooting Common Issues
Problem: Fudge is too soft Solution: Increase refrigeration time or try freezing for 1-2 hours. For next batch, use slightly less peanut butter.
Problem: Chocolate won’t swirl smoothly Solution: Make sure both layers are still warm when swirling. If the base layer has started to set, your chocolate won’t incorporate well.
Problem: Fudge tastes too sweet Solution: Use dark chocolate instead of semi-sweet, or add 1/4 teaspoon of salt to the peanut butter layer to balance sweetness.
Problem: Tiger stripes disappeared Solution: Over-swirling causes colors to muddy together. For next batch, use fewer, more deliberate swirls.
Problem: Fudge is crumbly Solution: This usually indicates overheated or seized chocolate. Make sure to melt slowly and add a bit more peanut butter to help bind.
My Personal Tiger Butter Story
Since making that first emergency batch for my neighbors three years ago, I’ve probably made tiger butter fudge a hundred times. It’s become my signature gift. I make it for teacher appreciation, hostess gifts, holiday parties, and any time someone needs a pick-me-up.
My favorite memory was when my daughter’s teacher mentioned loving peanut butter cups. For her birthday, I made a special batch of tiger butter fudge and packaged it beautifully with a note that said, “Like peanut butter cups, but fancier!” She later told me it was one of the most thoughtful gifts she’d received, and she couldn’t believe I’d made it by hand.
What started as a last-minute solution has become a cherished tradition. Every holiday season, I set aside a weekend to make multiple batches, experimenting with different swirl patterns and packaging. Friends and family have come to expect it, and I love watching their faces light up when they receive their box.
Final Thoughts and Secret Success Tip
This tiger butter fudge recipe is more than just a quick candy – it’s a confidence builder. If you’ve ever been intimidated by candy making or thought you couldn’t create impressive desserts, this recipe will change your mind. The foolproof method and stunning results prove that anyone can make something beautiful and delicious.
Here’s my secret tip that takes this fudge from great to extraordinary: Before the fudge fully sets, sprinkle a tiny bit of flaky sea salt over the top. The salt crystals add a sophisticated touch and enhance all the flavors – the sweetness of the white chocolate, the richness of the peanut butter, and the depth of the dark chocolate. It’s a simple addition that makes people think you’re a professional chocolatier.
Whether you’re making this for gifts, for a party, or just because you deserve something sweet, I hope you love this tiger butter fudge as much as my family and friends do. It’s proof that the best recipes don’t have to be complicated – sometimes magic happens with just three simple ingredients and a little swirl of creativity.
Happy candy making, and enjoy every rich, creamy, perfectly-swirled bite!